Posts in Home
Before & After: Our $150 Interior Entryway Makeover

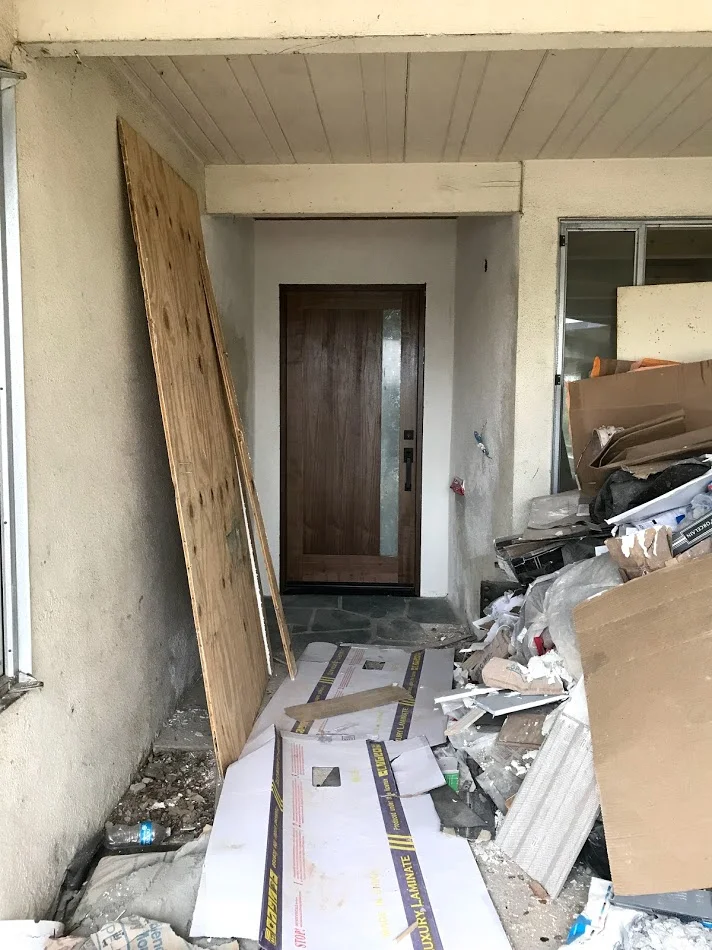
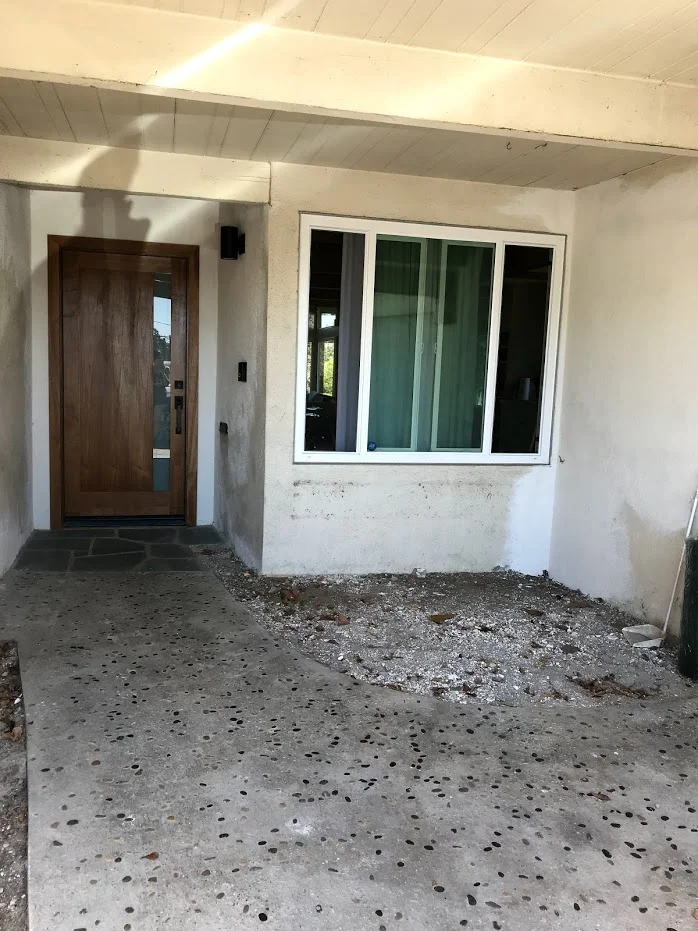
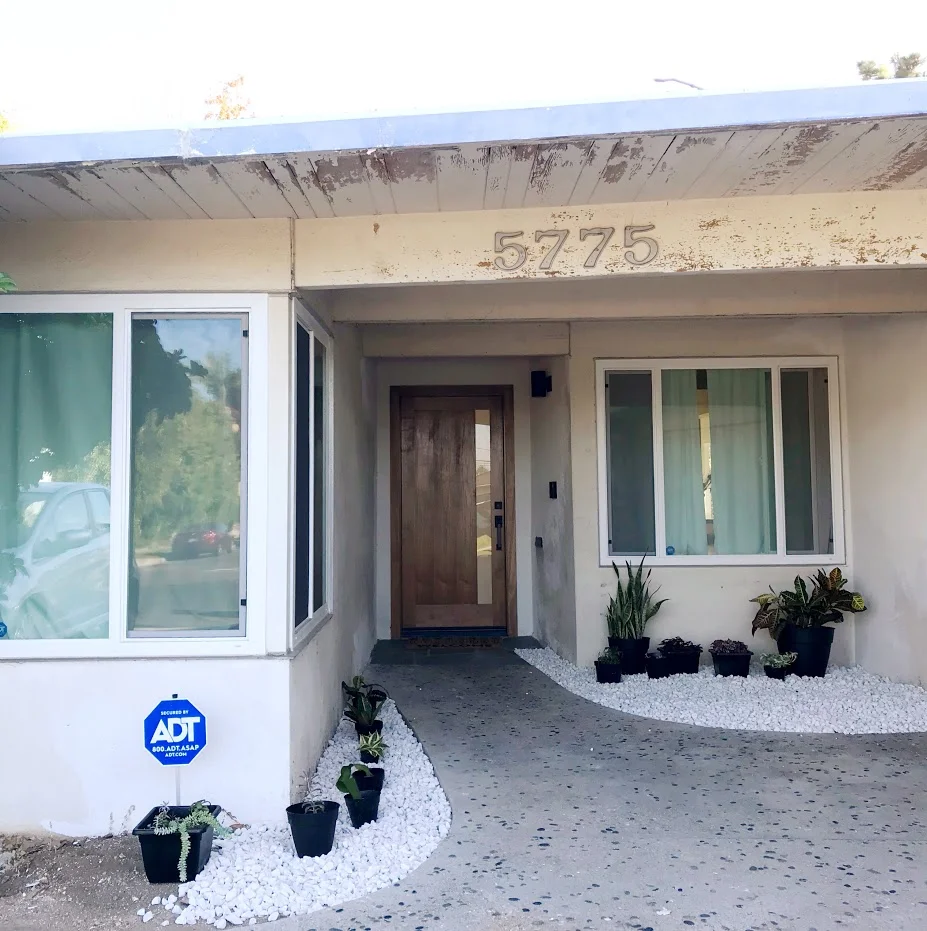
It was once a breakfast nook, then it become a shoe pile area, and now it’s an organized entryway!

ACS_0171.jpg

After scouring Pinterest for tons of inspiration photos, we finally had time last weekend to make 2 trips to Home Goods and 1 trip to Target to set the ambiance.

Source 1 / Source 2 / Source 3 / Source 4 unknown

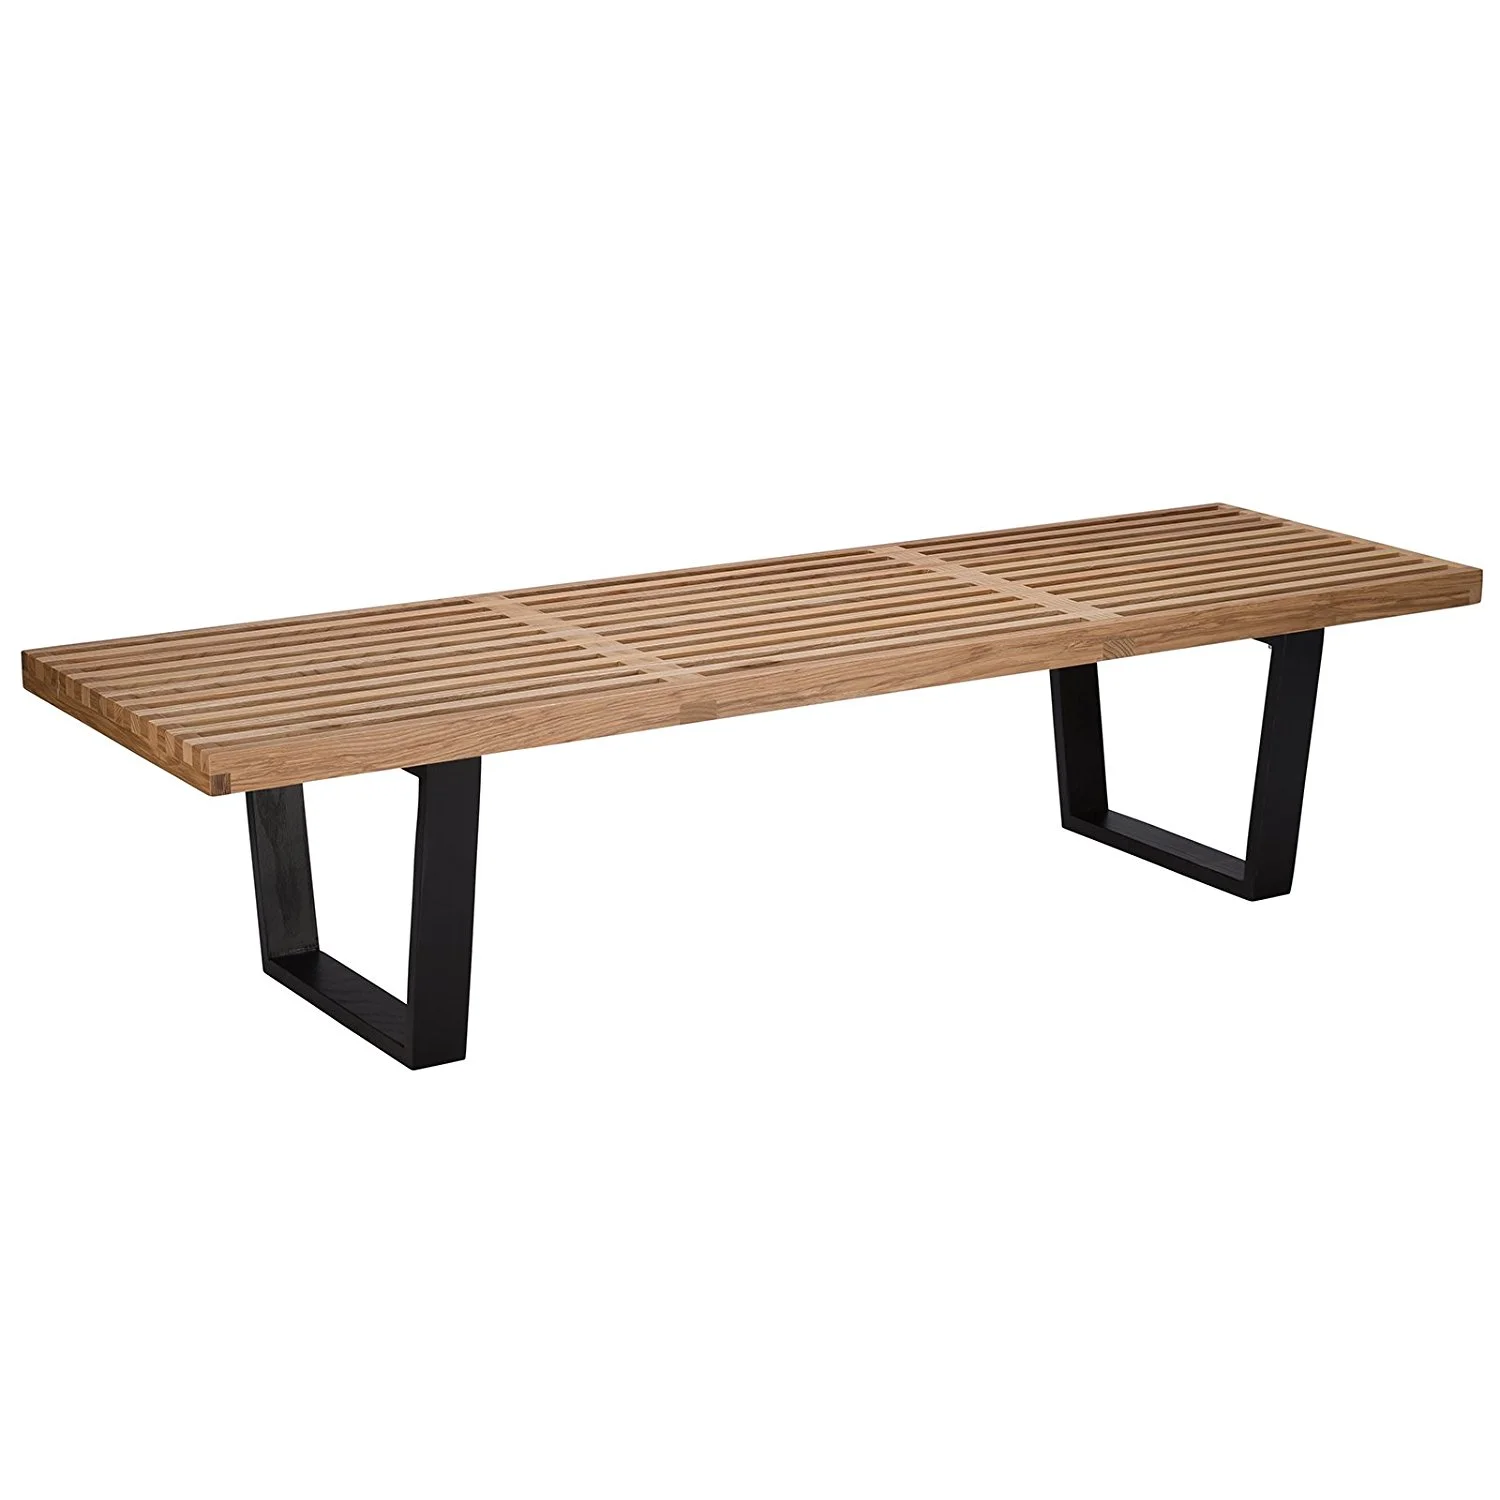
At first, we toyed with the idea of making it a reading nook with small couch and lamp. But with the minimal direct sunlight and distractions from the stop sign outside, we were 99% sure that it wouldn’t make sense for us. After all, that’s what the living room is for. So instead, I focused on finding a nice entry bench where we could sit to put on our shoes and collect mail from the slot in a cute wire basket.

I knew I wanted a bench with clean lines with either a wood or white finish. I found a few options from Amazon, but we couldn’t pass up this bench for $100 from Home Goods.

I also knew I didn’t want a shoe rack, and I loved the look of large baskets to keep our shoes completely hidden. These were $20 each from the kids section at Target.

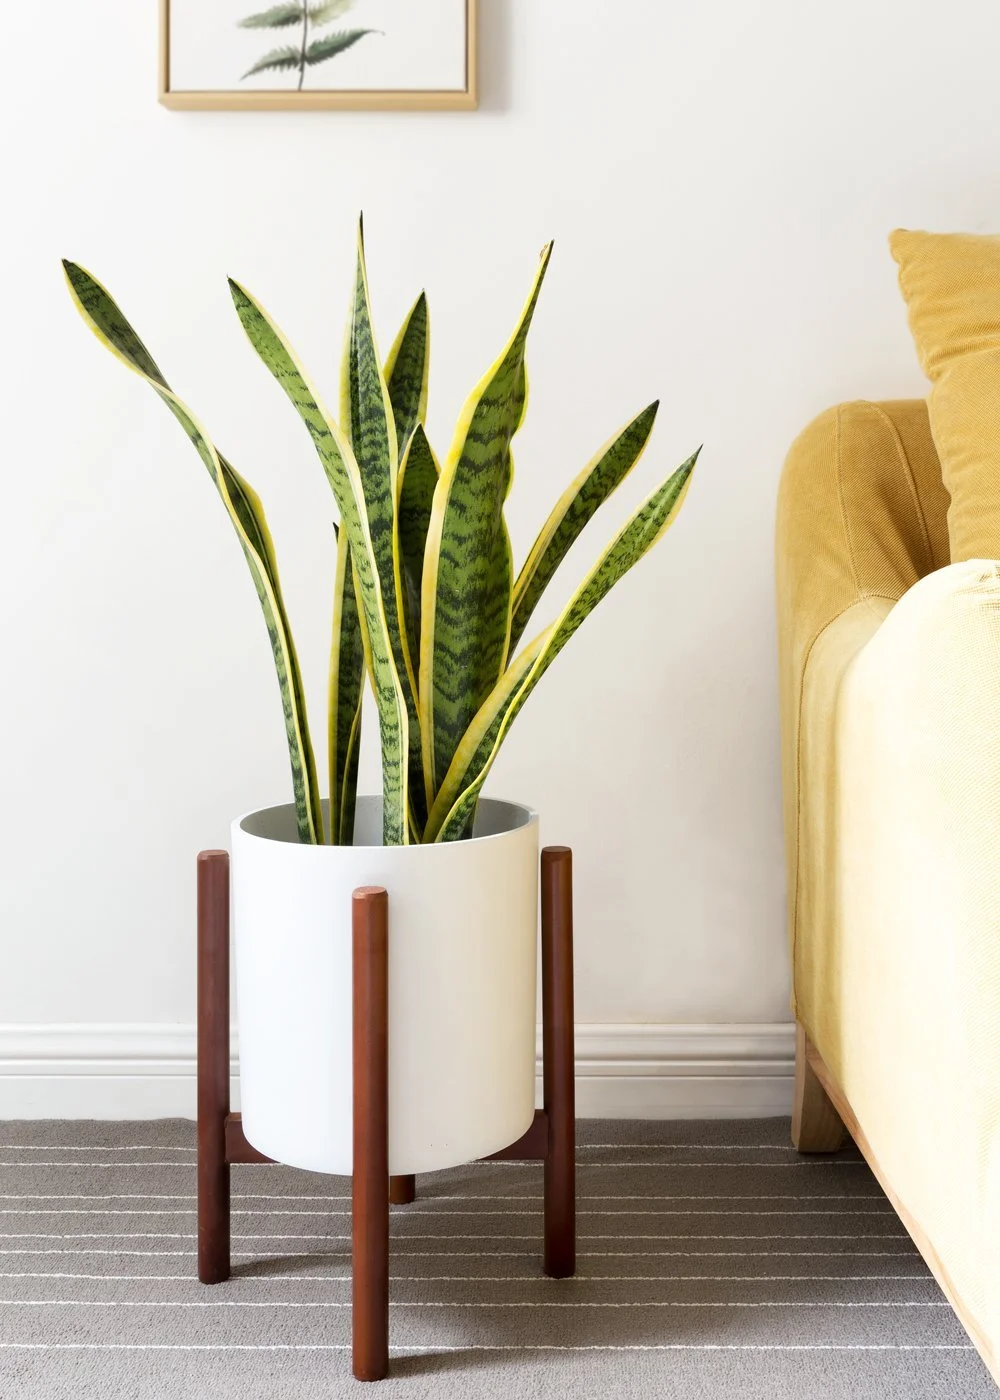
I styled the bench with a newly potted Swiss cheese plant from our friend Kristy (it’s THRIVING) and a West Elm throw pillow that had been on the couch. We’re also using the bench to store our purses and backpacks until we install coat hooks.

Adventures in Bread-Making: Attempt #1

We’ve been obsessed with the Great British Bake-off for quite some time now. After watching all the warm and toasty morsels they’ve made, I knew I wanted to expand my baking skills and try baking some loaves of my very own.

We recently received a Le Creuset from Alex’s Aunt Lena as a wedding gift. So when I saw the recipe for the Le Creuset bread with minimal kneading, I knew I needed it in my life.

I borrowed Alex’s mom’s KitchenAid stand mixer and set to work on Sunday morning. I had done lots and lots of research on Friday at work… watching YouTube videos of recipes like this one by Cutlery and More, reading blog posts like this one from The Kitchn about making a sourdough starter, and searching through photos of the most gorgeous baguettes. I decided to follow this recipe by Kitchen Joy because it seemed easy to follow and didn’t take over 24 hours to produce a final result.

I mixed together 4 cups of bread flour, 1 tsp. of salt, 1 tsp. active dry yeast, and 1.5 cups of warm water in the KitchenAid. The ball of dough formed (although in retrospect, I should have mixed it longer). Then, in my frenzy of getting out the door to see our friends at noon, I totally messed up and left the dough to rise… in the fridge. BIG MISTAKE.

When we came home almost 7 hours later, my dough didn’t double in size because the temperature slowed down the yeast. I took the dough ball out, rolled it around, and waited for it to reach room temperature. I also added a tablespoon of olive oil which gave the dough more elasticity and made it easier to roll.

After I let it rest at room temperature for about an hour, I put it in the Le Creuset and prayed to the bread gods. Keep in mind, it was about 8:30PM on Sunday night so I was eager to start baking even though I knew I should have let it rest and rise longer. I baked it for 30 mins. with the lid on, then removed the lid and baked for another 30 mins.

I was so nervous, but the result was glorious! Golden, crunchy, and aromatic! See it in action on our Instagram Story. :)

There’s definitely room for improvement, but like our homemade pasta, I’m so pleased with my first try. We’ve been eating a slice for breakfast every day this week and even toasting some with garlic and herbs to make croutons.

Notes for next time

  • Knead dough longer. Potentially add 1-2 tablespoons of olive oil.

  • More salt + add garlic to the pockets

Adventures in Pasta-Making: Attempt #1

On Friday night, our friends Adam and Katherine came over for our very first pasta night. We got the Marcato Atlas pasta maker from Crate & Barrel a week ago, and I was eager to try it out. We’ve only made pasta noodles once before so we didn’t really know what we were doing, but after doing some research on blogs, I was confident that we would figure it out with our foodie powers combined.

I used the Williams Sonoma egg pasta recipe. I wanted to be legit and handmade, so I made a nest out of 2.5 cups of all-purpose flour and cracked 4 eggs in the center. I beat it all together, forming the dough ball and letting it rest for 30 mins. Then we followed the instructions on the pasta maker, rolling the dough into a thin sheet and cutting the noodles with the knob set to 6.

We made two types of sauce: garlic butter (my favorite) and tomato basil. The noodles cooked for about 2 mins, and between the four of us, we actually ran out of noodles so we resorted to some dry packaged ones in our pantry. The texture of the noodles was very fresh, but a little bit doughy.

Notes for next time:

  • Use ½ all-purpose flour and ½ semolina flour for more texture in the noodles

  • Adjust egg yolk to egg white ratio for more golden-colored noodles

  • Make dough in Kitchenaid mixer for easier clean up

  • Flour the noodles more thoroughly so they don’t stick

6 DIY Halloween Costume Ideas

Happy October! This is the first year we’ll have trick-or-treaters at our house so we’ve started to get into the festive Halloween spirit. I also recently found these old pictures on my hard drive so let’s take a trip down memory lane!

We’re both big fans of DIY costumes so here are a few quick and easy ideas, just in time for Halloween and perfect for couples.

#1. Monsters Inc.

One of our first dates was at Disneyland for Alex’s birthday in January. I wanted to impress him so I made pretty adorable Sully and Boo hoodies for us. This was about 4 years ago so the details are fuzzy, but here’s a step-by-step.

Supplies for Sully Hoodie

Step by Step | Time Needed: 2 hours

  1. Using mason jars and bowls of various sizes, trace circles in the purple velvet and cut.

  2. Glue to front and back of hoodie. (Bonus points: I put three circles together on the back left to make a Hidden Mickey)

  3. Draw horns on cardboard and cut.

  4. Use the cardboard as a template and trace on gray felt with a 1” seam allowance. Cut and repeat with opposite sides. You should have 4 total pieces.

  5. With opposite sides facing in, sew together but leave about 3 inches open and turn inside out. Before you close the seam, insert the cardboard and cotton balls/stuffing. This will give the horns shape and help them stand up when the hood is worn.

  6. Sew horns onto hoodie. Rawr!


Supplies for Boo Hoodie

Step by Step | Time Needed: 2 hours

  1. Use a mason jar as a template for the eyeball pupil. Trace onto black felt and cut. (2 pieces)

  2. Now find a mason jar that’s about 1-2 in. wider. Trace onto white felt and cut (2 pieces). Repeat on black felt and cut (2 pieces).

  3. Glue the pupils onto the white circles.

  4. With the right sides facing in, sew the white circle to the black circle. Leave about 2 in. to turn inside out and fill with cotton balls/stuffing.

  5. To make the eyeball “bases,” cut approx. 4”x6” pieces from the black felt. Fold and sew into little tubes and attach to the main eyeballs. They should kind of look like lollipops. Eyeball lollipops. Does this even make sense lol.

  6. Sew the entire eyeball situation to the hood. They’ll be a little top-heavy, but that’s ok. It’ll look super cute and floppy.

  7. To make the teeth, draw a rounded rectangle onto the cardboard. Use this as a template and trace onto white felt with a 1/2” seam allowance. Repeat so you have 8 total pieces.

  8. With the right sides facing in, sew the perimeter and turn into out. You’ll end up with 4 teeth total. Sew onto the front of the hood.

  9. To make the “hair,” cut about 10” long strands of gray yarn. Gather about 20 strands and tie together in the middle. Now sew this bundle around the eyeball lollipop base.

  10. Repeat as needed to achieve a mop-like effect. Lol. I think I did it 5 times.

  11. Be cute and make Boo proud!

#2. Star Wars

A few months later, we dressed up as Darth Vader and a Stormtrooper for Yuri’s Night at the California Science Center. This was a super easy costume, and we got so many compliments.

Supplies for Darth Vader


Supplies for Stormtrooper

  • Stormtrooper Helmet

  • Black and white top (I found my crop top on sale at Charlotte Russe for $10)

  • White tutu (I made mine from tulle and an elastic headband, but this tutu would also work great. I also wore this knee-length tutu for our wedding reception).

#3. Unicorn

Same tutu, different costume. I planned this costume the night before Halloween in a frenzy to wear something cute to the office costume party the next day.

Unicorn Supplies

#4. Penguin

This was a spontaneous buy from the CVS in Vegas. It’s a very safe office costume for those moments when you’re not sure how committed your coworkers are going to be on Halloween. Amazon doesn’t have the vest, but they do have this cozy robe.

#5. Tinkerbell

Also a relatively safe go-to that involves yet another tutu.

1936814_124291637058_4110032_n.jpg
378638_10150396344153269_1297617986_n.jpg

Tinkerbell Supplies

#6. Grandma

I wore this “costume” for my friend Sharon’s murder mystery holiday party. All you need is glasses, baggy clothes, a walking cane, and a cranky attitude.

Happy Halloween!

NOTE: SOME OF THE LINKS CONTAINED IN THIS POST ARE AFFILIATE LINKS. THIS MEANS THAT IF YOU CLICK ON AND/OR MAKE A PURCHASE FROM THE AFFILIATE THROUGH CERTAIN LINKS ON THIS BLOG OR THROUGH ANY RELATED SOCIAL MEDIA PLATFORMS (INCLUDING INSTAGRAM), I (DAPHNE HO) MAY RECEIVE A COMMISSION.

HomeDaphne ChanDIYComment
Before & After: Our $200 Exterior Entryway Makeover

After many morning runs around the neighborhood and seeing our neighbors’ landscaping, we knew we needed to step up our game. And with Halloween and the holidays right around the corner, we wanted our home to be a little more presentable. We’ve been talking about it since we moved in May, but now that things have slowed down a bit after the wedding, we finally brought the vision to life.

This was what the entryway looked like when we bought it, during renovations, and post move-in. Not cute.

Our budget was $150. I wanted to keep it modern and low maintenance: a container garden with lush, low-light plants in black pots and white gravel (in anticipation that we’ll be eventually painting the exterior of the house gray).

Pinterest gave me a couple ideas [source 1, source 2 unknown]

Our first haul from Home Depot cost $160. This included 9 bags of white marble chips, 7 low-light plants, 1 large bag of potting soil, and 5 containers.

Plants purchased included a snake plant, ivy, and croton petra, to name a few.

We started by shoveling the layers of dust and debris into the garbage can. And let me tell you, it was dusty. We had to wear goggles and face masks. In the process, we unearthed nails, glass, and seashells — remnants of the previous owners’ attempt at landscaping.

Then we leveled the dirt with a rake and Alex power washed the dusty sides of the house and walkways. After it dried, he placed a layer of cardboard over the dirt to keep the dust a little more controlled. And then he poured all nine bags of gravel over it. It only covered half of the entryway area so it was time for another Home Depot run! This second trip cost about $60 (9 more bags of gravel, another bag of potting soil, and 4 more plant containers). So in total, we spent just a little over $200 and 3 hours.

ACS_0175-1.jpg

About a third of the plants were ones we already owned and propagated, like the succulents and Queen of the Night leaves that my dad gave me in July. We still need more gravel for a tiny bit of the walkway and the curb area, but we’re so happy with the improvement!

HomeDaphne ChanDIYComment
Post-DestinationWedding Advice

We’re still glowing from our wedding and honeymoon in Bali! Everything went mostly according to plan, we received several cuts from our videographer, and we’re still waiting for the professional photos. We couldn’t be happier! Since my last post, we also learned a few things about the destination wedding planning process.

IMG_7196.JPG

#1. Expect to Play Host

Of course, the amount of your involvement is completely up to you. But since our guests had traveled so far and so long to be with us, we felt that it was the least we could do. The night before our wedding, I even sent out a spreadsheet to help arrange and coordinate shuttle rides home for our guests —a small extra gesture to show our appreciation. We also arranged massages by the beach for our family members who stayed with us at Villa Taman Ahimsa.

#2. The Unexpected is Inevitable

If you’re the type of person who dreams of their wedding going a certain way, I’m sorry to say that a destination wedding is not for you. We put in a ton of time and research to find an amazing coordinator to help minimize any surprises (big hugs to Adria Chew from Avavi Weddings!). But even then, there are some things that are just out of everyone’s control. Like waking up to a mosquito bite on my left eyelid just three days before the wedding (luckily, the swelling went down after I placed a cold water bottle on it for a couple hours). Or vomiting and having a fever just two days before the wedding (likely from a bit of food poisoning). And to top it all off, getting a little sunburnt on my face and sleeping with an ill-fitting eye mask that put a little too much pressure on my eyes the day before the wedding. There’s an expectation that everything needs to be perfect, but if you go into it with the right mindset, everything will be awesome no matter what happens.

#3. Pack Light

I stuffed my wedding dress, reception skirt, tea ceremony dress, and wedding shoes into my carry on. We checked in two bags: one which had Alex’s suit and miscellaneous wedding things (signs, welcome bags, hand fans) and another with our clothes and toiletries. The less you have to bring, the more you can focus on enjoying your big day instead of trying to manage a million little things and inevitably forgetting to repack something.

4. Make Time to Hang Out with Everyone after the Wedding

We made sure to grab our guests’ itineraries so we could be aware of everyone’s travel plans. We were able to squeeze in one more meal with some of our friends after the wedding, and they were some of the highlights of our trip!

5. Hire a Videographer

This was actually a point of debate between Alex and me. However, we were able to meet in the middle and create a custom package with our videographer for 5 hours (plus add-on hours if needed) instead of the usual 8 hours minimum. This allowed us to capture the parts that really mattered to us: moments before the first look, the vows, speeches, and dances. Our videographer Adi from Filomena/Aki Photograph was phenomenal, and we’re so happy with the results. The day flew by so fast! Within two weeks, Adi sent us a 5-minute wedding highlights reel and a one-hour wedding documentation video. We’re so happy that we can also share the video with friends and family who could not attend, and we’ll treasure the captured memories forever.

HomeDaphne ChantravelComment
Glimpses of Married Life

Our first week back home after our destination wedding in Bali involved grocery shopping at Costco, purchasing a Roomba, baking snickerdoodles, reading new books, making arepas with Venezuelan friends, and celebrating Kristy’s birthday.

We’re also decluttering our closets, tending to neglected plants, starting to plant new seedlings after I accidentally over-fertilized our first batch from the summer, and preparing to experiment with pasta making!

New tabs on the blog for recipes, travel, and landscaping to come!

The Easiest Crepe Recipe Ever

Saturday was spent with girlfriends over mimosas, bacon, and strawberry Nutella crepes. This is the second time I've hosted with crepes, and it's now my go-to recipe for entertaining. They require minimal ingredients, minimal effort, cook quickly, and result in a huge crowd-pleaser.

The Easiest Crepe Recipe Ever

Time needed: 10 mins. for prep, 20 mins to cook. Yields 8 crepes.

Ingredients

  • 1 cup all purpose flour

  • 1 tablespoon sugar

  • 1/4 teaspoon salt

  • 1 1/2 cups whole milk

  • 4 eggs (do not separate yolks and whites)

  • 3 tablespoons unsalted butter, melted

  • Optional toppings: Nutella, strawberries, syrup, and powdered sugar OR spinach, mushrooms, and cheese

Instructions

  1. In a blender, combine flour, sugar, salt, milk, eggs, and butter.

  2. Puree until smooth and bubbles form on top, about 30 seconds. Let batter sit at least 15 minutes at room temperature.

  3. Heat a 12-inch nonstick skillet over medium. Give it a spritz of cooking spray. Add 1/3 cup batter and swirl the pan to completely cover it in a thin layer. Cook until the crepe sets slightly (like a pancake), then plop some filling inside. It doesn't have to be pretty because you'll fold the crepe over when it's done.

  4. Cook until the underside of the crepe is golden brown, 2 to 3 minutes.

  5. Loosen edge of crepe with a spatula, then fold into quarters and slide out of skillet.

  6. Repeat with remaining batter (or refrigerate in an airtight container up to one week; stir before using).

Minimalist Favorites

One of my guilty pleasures is watching YouTube videos and reading blogs about minimalism. I'm especially hooked on Rachel AustPick Up Limes, and Hello Hoku.

Becoming a homeowner helped open my eyes to my personal style, especially as we were renovating our kitchen and bathrooms and making such permanent decisions. Will we still like the tile in five years? Will this faucet match the toilet? Will potential buyers feel the same about our ultra pure white cabinetry? 

Renovating and paying a mortgage AND wedding planning also made us hyper-aware of our spendings. We're passionate meal planners, and we try our best to resist making purchases unless we absolutely need it. No splurges on bad days. No snacks. No cheap junk. It's all about functionality.

Today, I started watching Minimalism: A Documentary about the Important Things on Netflix, and it speaks to me on so many levels. Our lives practically revolve around cleaning and caring for our home, and our mood instantly changes as soon as we wipe down the floors or stove. And it's all the little moments in between — making the bed, putting the remote control back into the TV console, putting our shoes in a rack — that help us clear our minds and love our space even more.

Like a lot of our friends in their late 20s, we're also trying to get rid of our old, cheap furniture from college and upgrade to more intentional pieces. Here are a few that we've added to our collection, and others that are on my shopping list.

HomeDaphne Chanlifestyle
Current Mood: Favorite Kitchen Gadgets

Alex & I are dedicated meal planners and spend the majority of our time in the kitchen. We feel naked if we don't grocery shop over the weekend. We pack our lunches nearly every day, make breakfast together, and take pride in winging our cooking instead of following a recipe. So we've grown pretty attached to some of the items in our kitchen. Here are some of our not-so-secret favorites!

#1. Lodge Cast-Iron Skillet

My cast-iron skillet is my pride and joy. When I first started using it, it took forever to wash off scrambled eggs and cheese. But after a lot of TLC and many seared salmon filets later, the seasoning on my skillet is impeccable. Cleaning it is also super easy. I use sea salt to scrape off stubborn bits of food, rinse it, then place it back on the stove to evaporate the water.

#2. Ovalware Cold Brew Maker

We just bought this aesthetically pleasing cold brew maker for coffee and tea, and we use it each day. I'm terrible at making French press coffee, so this cold brew maker is a foolproof way to have strong, fresh coffee every morning with minimal effort.

IMG_6440.jpg

#3. Instant Pot

We got our Instant Pot just as the craze was beginning, and it's never let us down since. We use it to make rice, soup, porridge, hard-boiled eggs, stews... I've even made a cheesecake with it.

#4. Breville Juicer

In preparation for our wedding and getting our #BaliBod into shape, Alex has been juicing and I've been dumping the pulp in my compost bin. I bought this juicer after watching Fat, Sick, and Nearly Dead and it's great at handling tough veggies like carrots and beets.

IMG_5047.jpg

#5. Microplane

It's one of those little things you never knew you needed. I love making Chinese sauces with garlic, ginger, and green onion, and the microplane is perfect for shaving up the ginger. I'm also a big fan of lemons, and it adds the perfect amount of zest to dressings and dishes.

DIY Stamped Canvas Bags

We’ve started packing a suitcase for all the wedding items we need to bring over to Bali: placecards, favors, accessories, etc. We’re also making welcome bags for our guests to fill with small personal items like individually packaged Tylonel, Pepto-Bismol, and makeup remover wipes.

Some people go crazy elaborate with their welcome bags, but we wanted to keep it simple and affordable. Luckily, we had these small canvas bags from Alibaba stashed away from a previous project. Alex used our stamp kit and ink to customize our names on the welcome bags and voila!

DIY Stamped Canvas Bags

Time needed: 30 mins. for 50 bags

Supplies

Instructions

  1. Choose your letters and tape them together in a row. You might need to get creative here for words or phrases that have repeating letters. For example, we stamped “ALEX & D” first, then went back and taped together “APHNE.”
  2. Practice on a piece of paper to make sure they’re aligned properly (some letters may not hit the ink even if you’re think they’re straight).
  3. Once you’re happy, stamp away on the canvas bags!
  4. Let dry and feel proud.
How to Plan a Destination Wedding — in Bali!

Growing up, I was never the type of person who fantasized about my perfect wedding day. I knew I would have a pretty dress that would make me feel like a princess. I knew the photos and decor would be beautiful. And I always knew I would plan it with my future husband so that it would be special to us.

We got engaged in Paris almost immediately after our friend's wedding in Italy. Paul and Marisa booked an 8-bedroom villa in Florence for their family to stay with them, and we loved the idea of having a central location for both relaxation and the ceremony/reception.

We tossed around the idea of having it somewhere near the ocean like the Maldives or Santorini. But we decided on Bali for a few important reasons. We've heard great things from friends who've traveled there multiple times. The cost of having our wedding there is also significantly more affordable than if we were to have it in Los Angeles. And it's a 4-hour flight from Bangkok so Alex's grandma can comfortably attend. Of course that means for the rest of us, it's a minimum 19-hour trip. But it's a small price to pay for paradise. :)

If you're planning a destination wedding or are curious how we're planning ours, here are my biggest tips.

#1. Hire a Coordinator

You're going to want someone who knows the language and the lay of the land by your side. After we picked the location and venue, I spent a few weeks scouring the internet for wedding planners in Bali (who also had to meet the villa's certification requirements). I made a huge spreadsheet to track who I emailed, who responded, who I liked, and who I scheduled Skype interviews with. Ultimately, we chose Adria from Avavi Weddings and the By Your Side package. This meant that Adria would help refer vendors, but it was up to us to interview them, choose one, schedule everything, and keep track of when to pay them. 

#2. Get Used to Foreign Money and Time Zones

For me, this was the hardest part. There was always a bit of extra coordination needed to communicate, and we mentally prepared ourselves for sticker shock (keep in mind that 14,250 Indonesian rupees equals about $1 USD). So we got used to seeing lots of zeros and holding our breaths before realizing that things weren't as expensive as we initially thought. We also got used to wiring money from our bank and erred on the side of overpaying to account for bank transfer fees. 

#3. Send E-Mails to Your Guests

They'll appreciate it! Since many of our guests have never been to Bali, Alex and I took a short trip at the end of May to meet with our coordinator and get a feel for the culture. Afterwards, we sent an email out to share our experience with our guests and set expectations. We also sent a reminder RSVP email and plan to send one more final email with a packing checklist, important addresses, and phone numbers.

#4. Account for Worst Case Scenario

We're going to pack our suit and dress in our carry-on in the event that our luggage gets lost. We also recommend asking your coordinator to locate the nearest doctor and hospital, just in case.

#5. Make Pinterest Boards

Live your best Pinterest life and make a board (or five) to send to florists, decorators, cake designers, etc. It's tricky to plan a wedding that's far away especially with language barriers, so try to communicate with visuals as much as possible. Here is one of mine

#6. Get There Early

We're leaving on Aug. 29 to prepare for the wedding on Sept. 4. That gives us enough time to adjust to the jetlag, greet our guests at our Welcome Lunch on Sept. 3, and settle in with our friends and family.

#7. Keep It Simple

You're already in a beautiful location so not much else is needed. We also decided to not have bridesmaids or groomsmen and omit DIY projects. The simpler, the better.


Now go enjoy your wedding!