Posts in Home
Installing Drought-Tolerant Landscaping

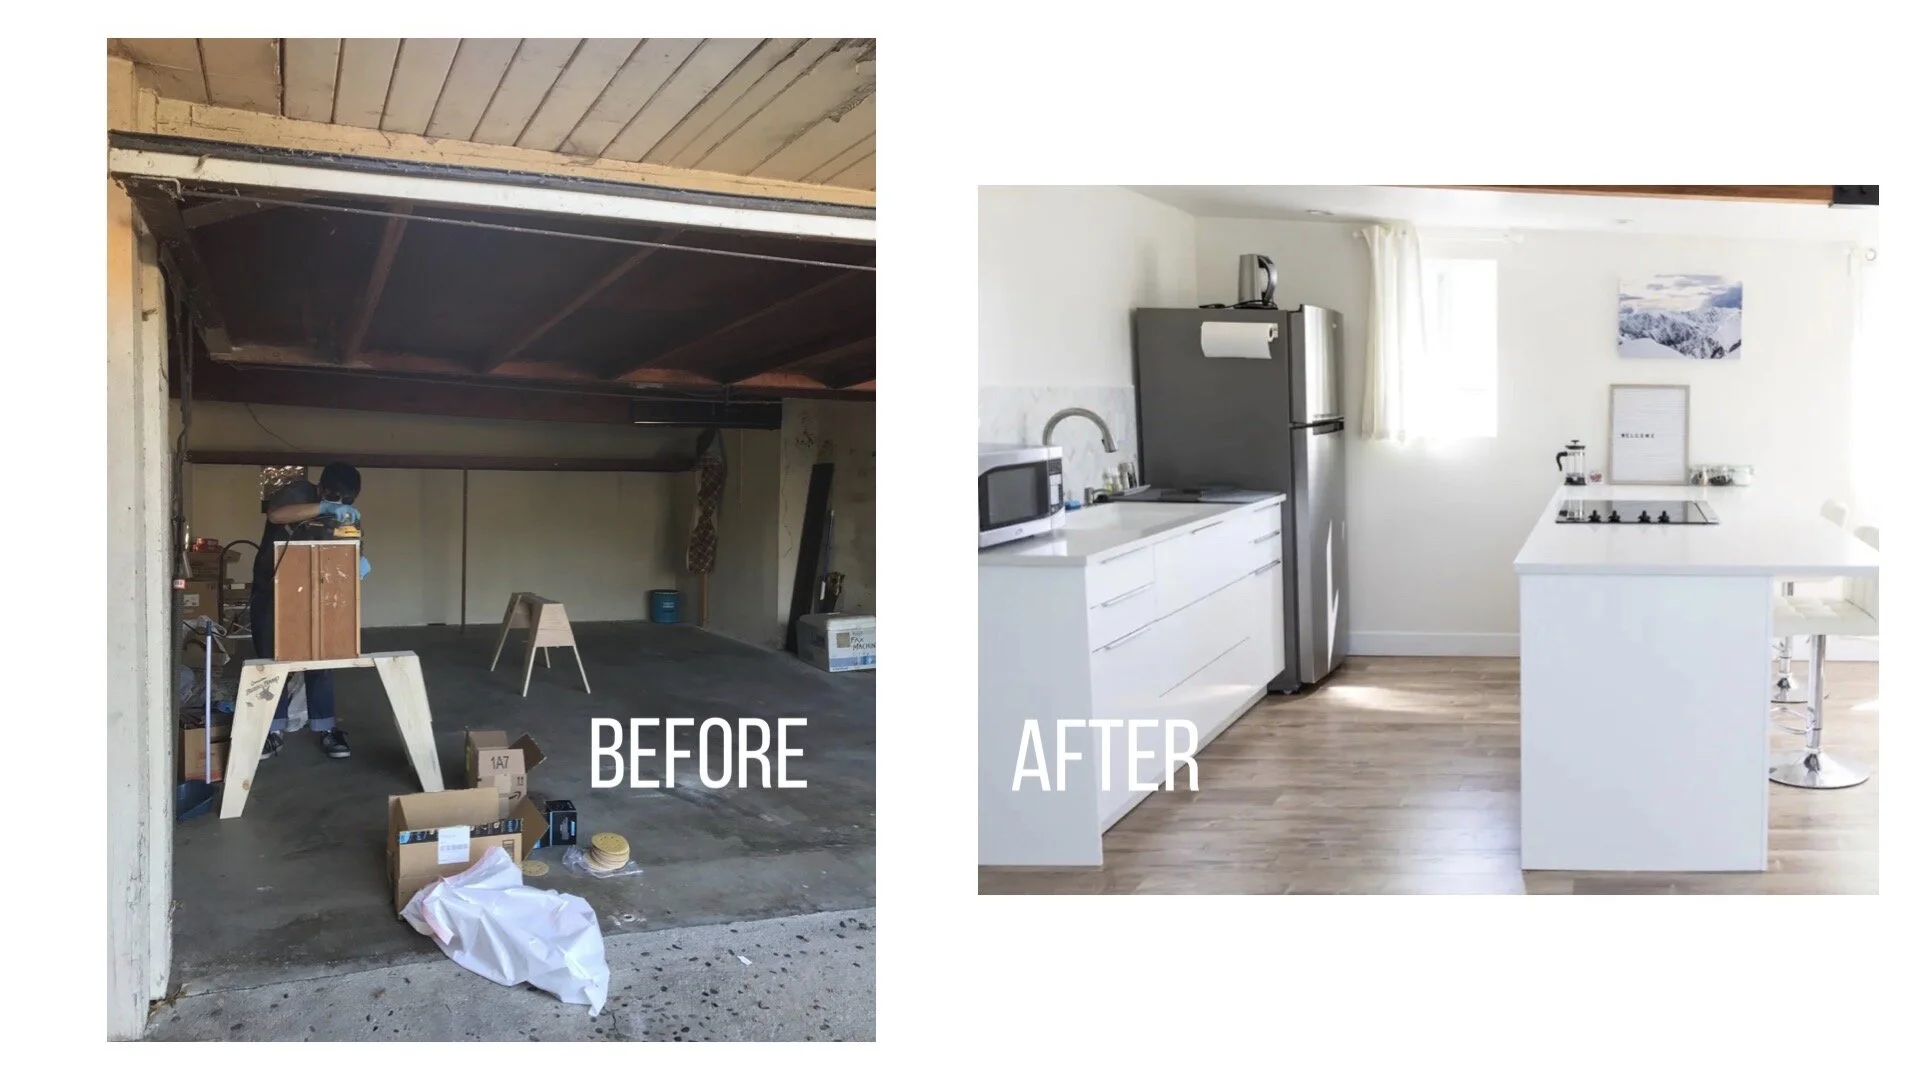
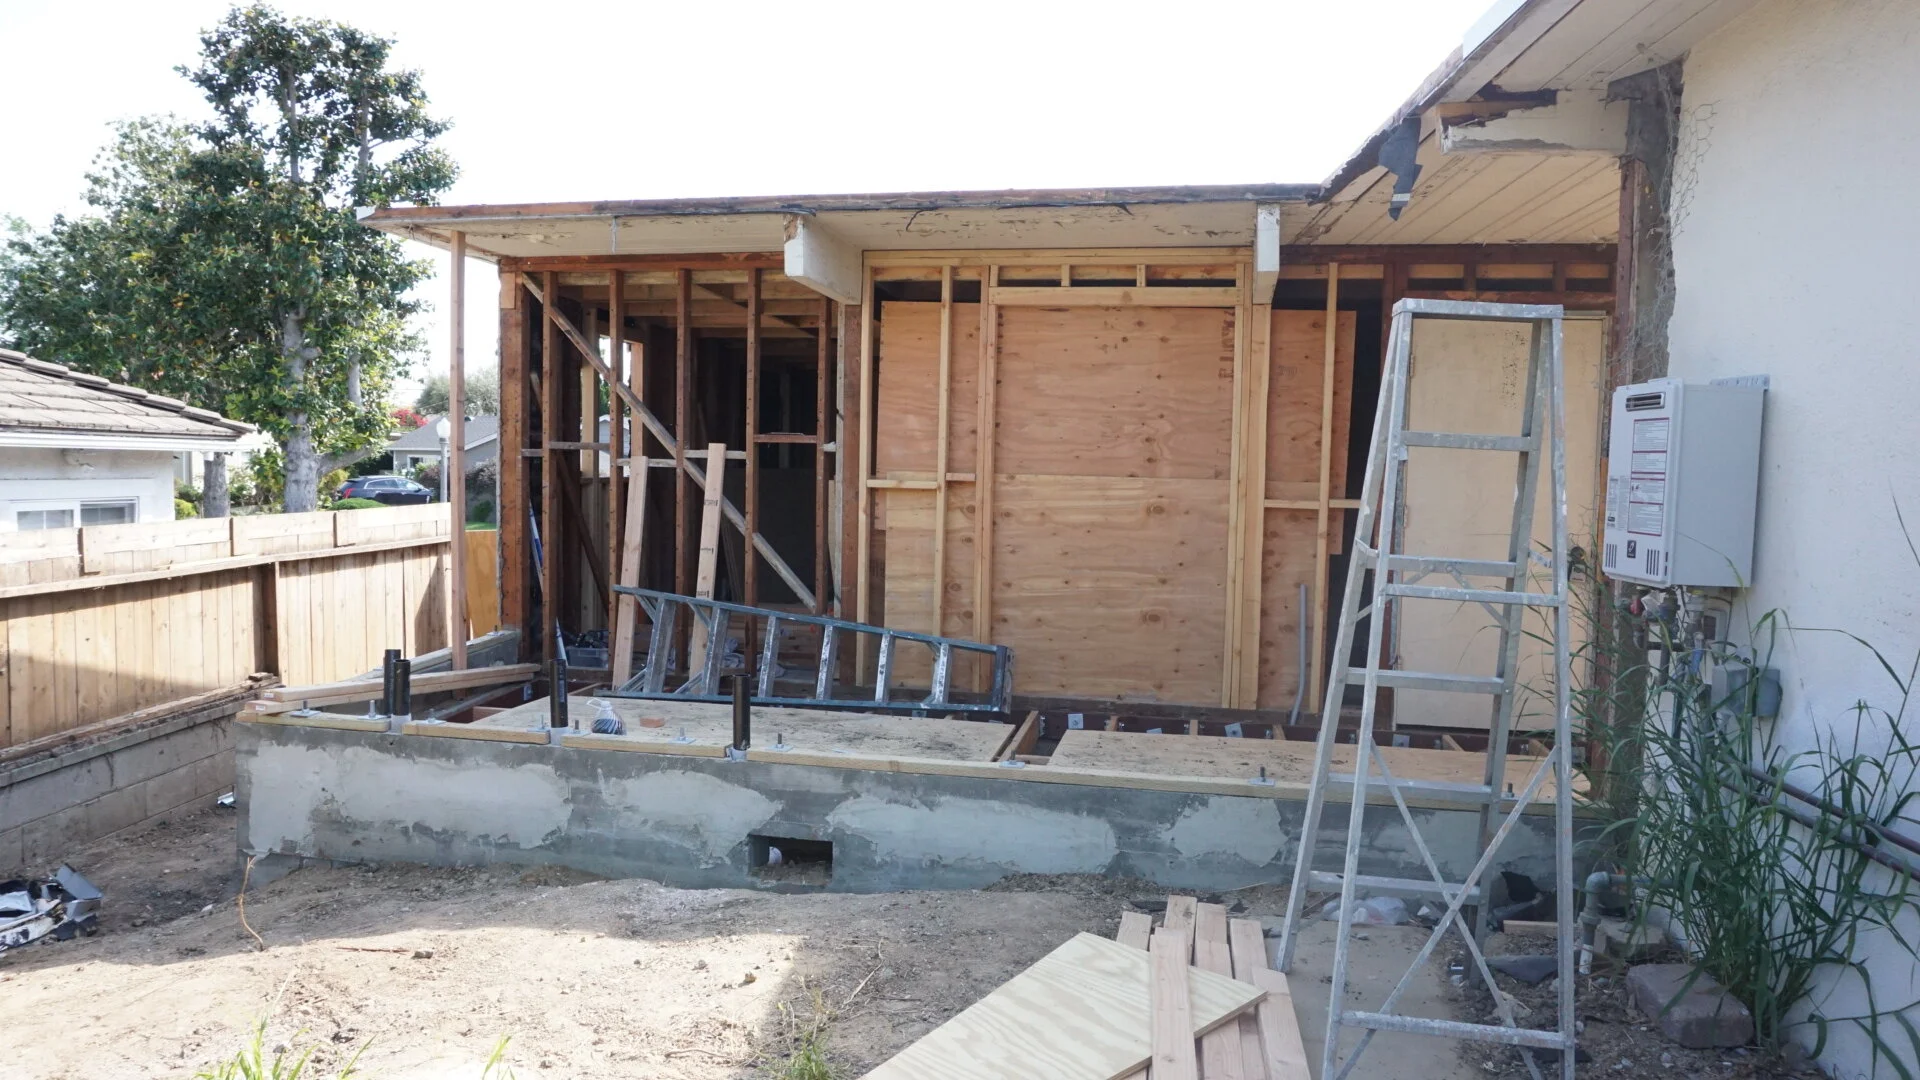
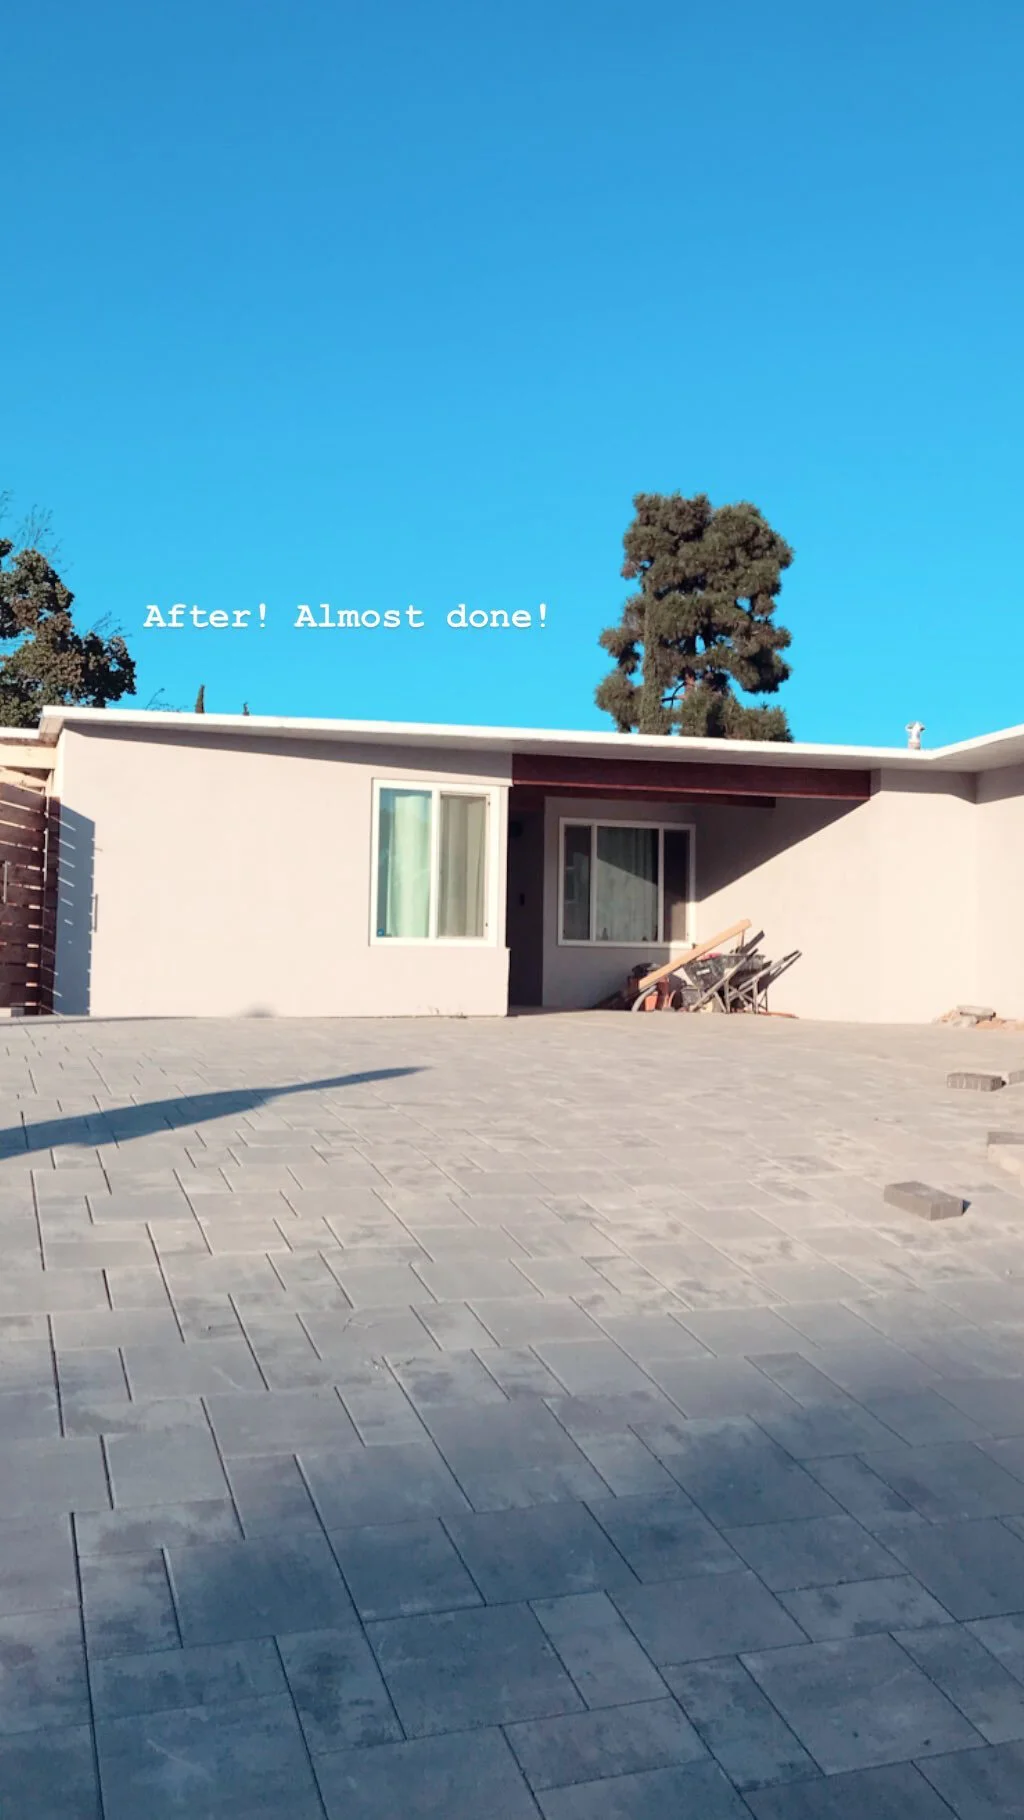
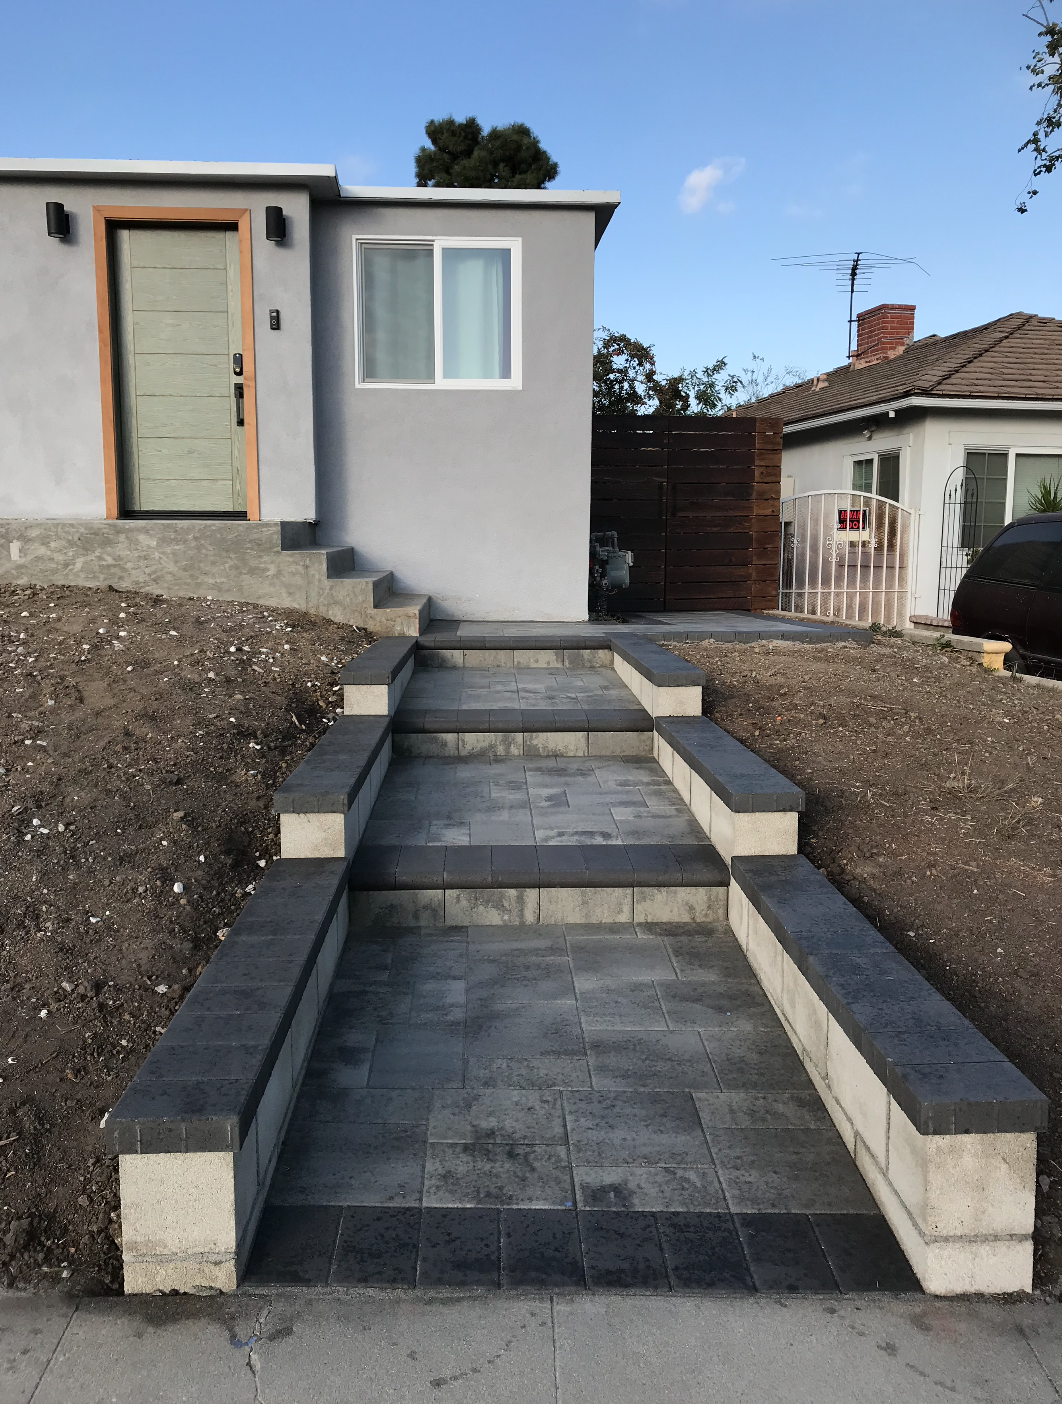
After finishing the garage conversion, repainting the front exterior, and re-doing the driveway last summer, we finally completed the last piece of the renovation puzzle – landscaping! It became one of my personal projects while on maternity leave. A fun mix of exploring designs, meeting with landscapers, and researching the LADWP WaterWise Turf Replacement Rebate.

We knew we wanted something low maintenance, considering how much work we put into the backyard (and still have so much to go). The yard is south-facing which means it gets a lot of sun, and it slopes downwards toward the sidewalk. I set to work researching and memorizing which plants I liked, planning different height and color combinations, and creating mocks in Photoshop to see how it would all tie together with the house color and driveway pavers. Having a completely blank slate did feel a little overwhelming, so here are a few directions I explored.

As we did more research on the LADWP Turf Replacement Rebate, we realized that we would have to follow a certain set of parameters in order to qualify. This included choosing non-invasive drought-tolerant plants, using mulch as ground coverage, and installing some sort of rainwater feature like a river rock bed. Like any home project, we quickly learned some very specific terminology like “berms” (basically mounds of dirt) and worked closely with Anthony & Son Landscaping in order to meet all the requirements.

We really enjoyed Anthony’s quick communication and attention to detail. He even brought over samples of the mulch and gravel before he got to work so we could make some decisions in-person (like choosing the color of the river rock).

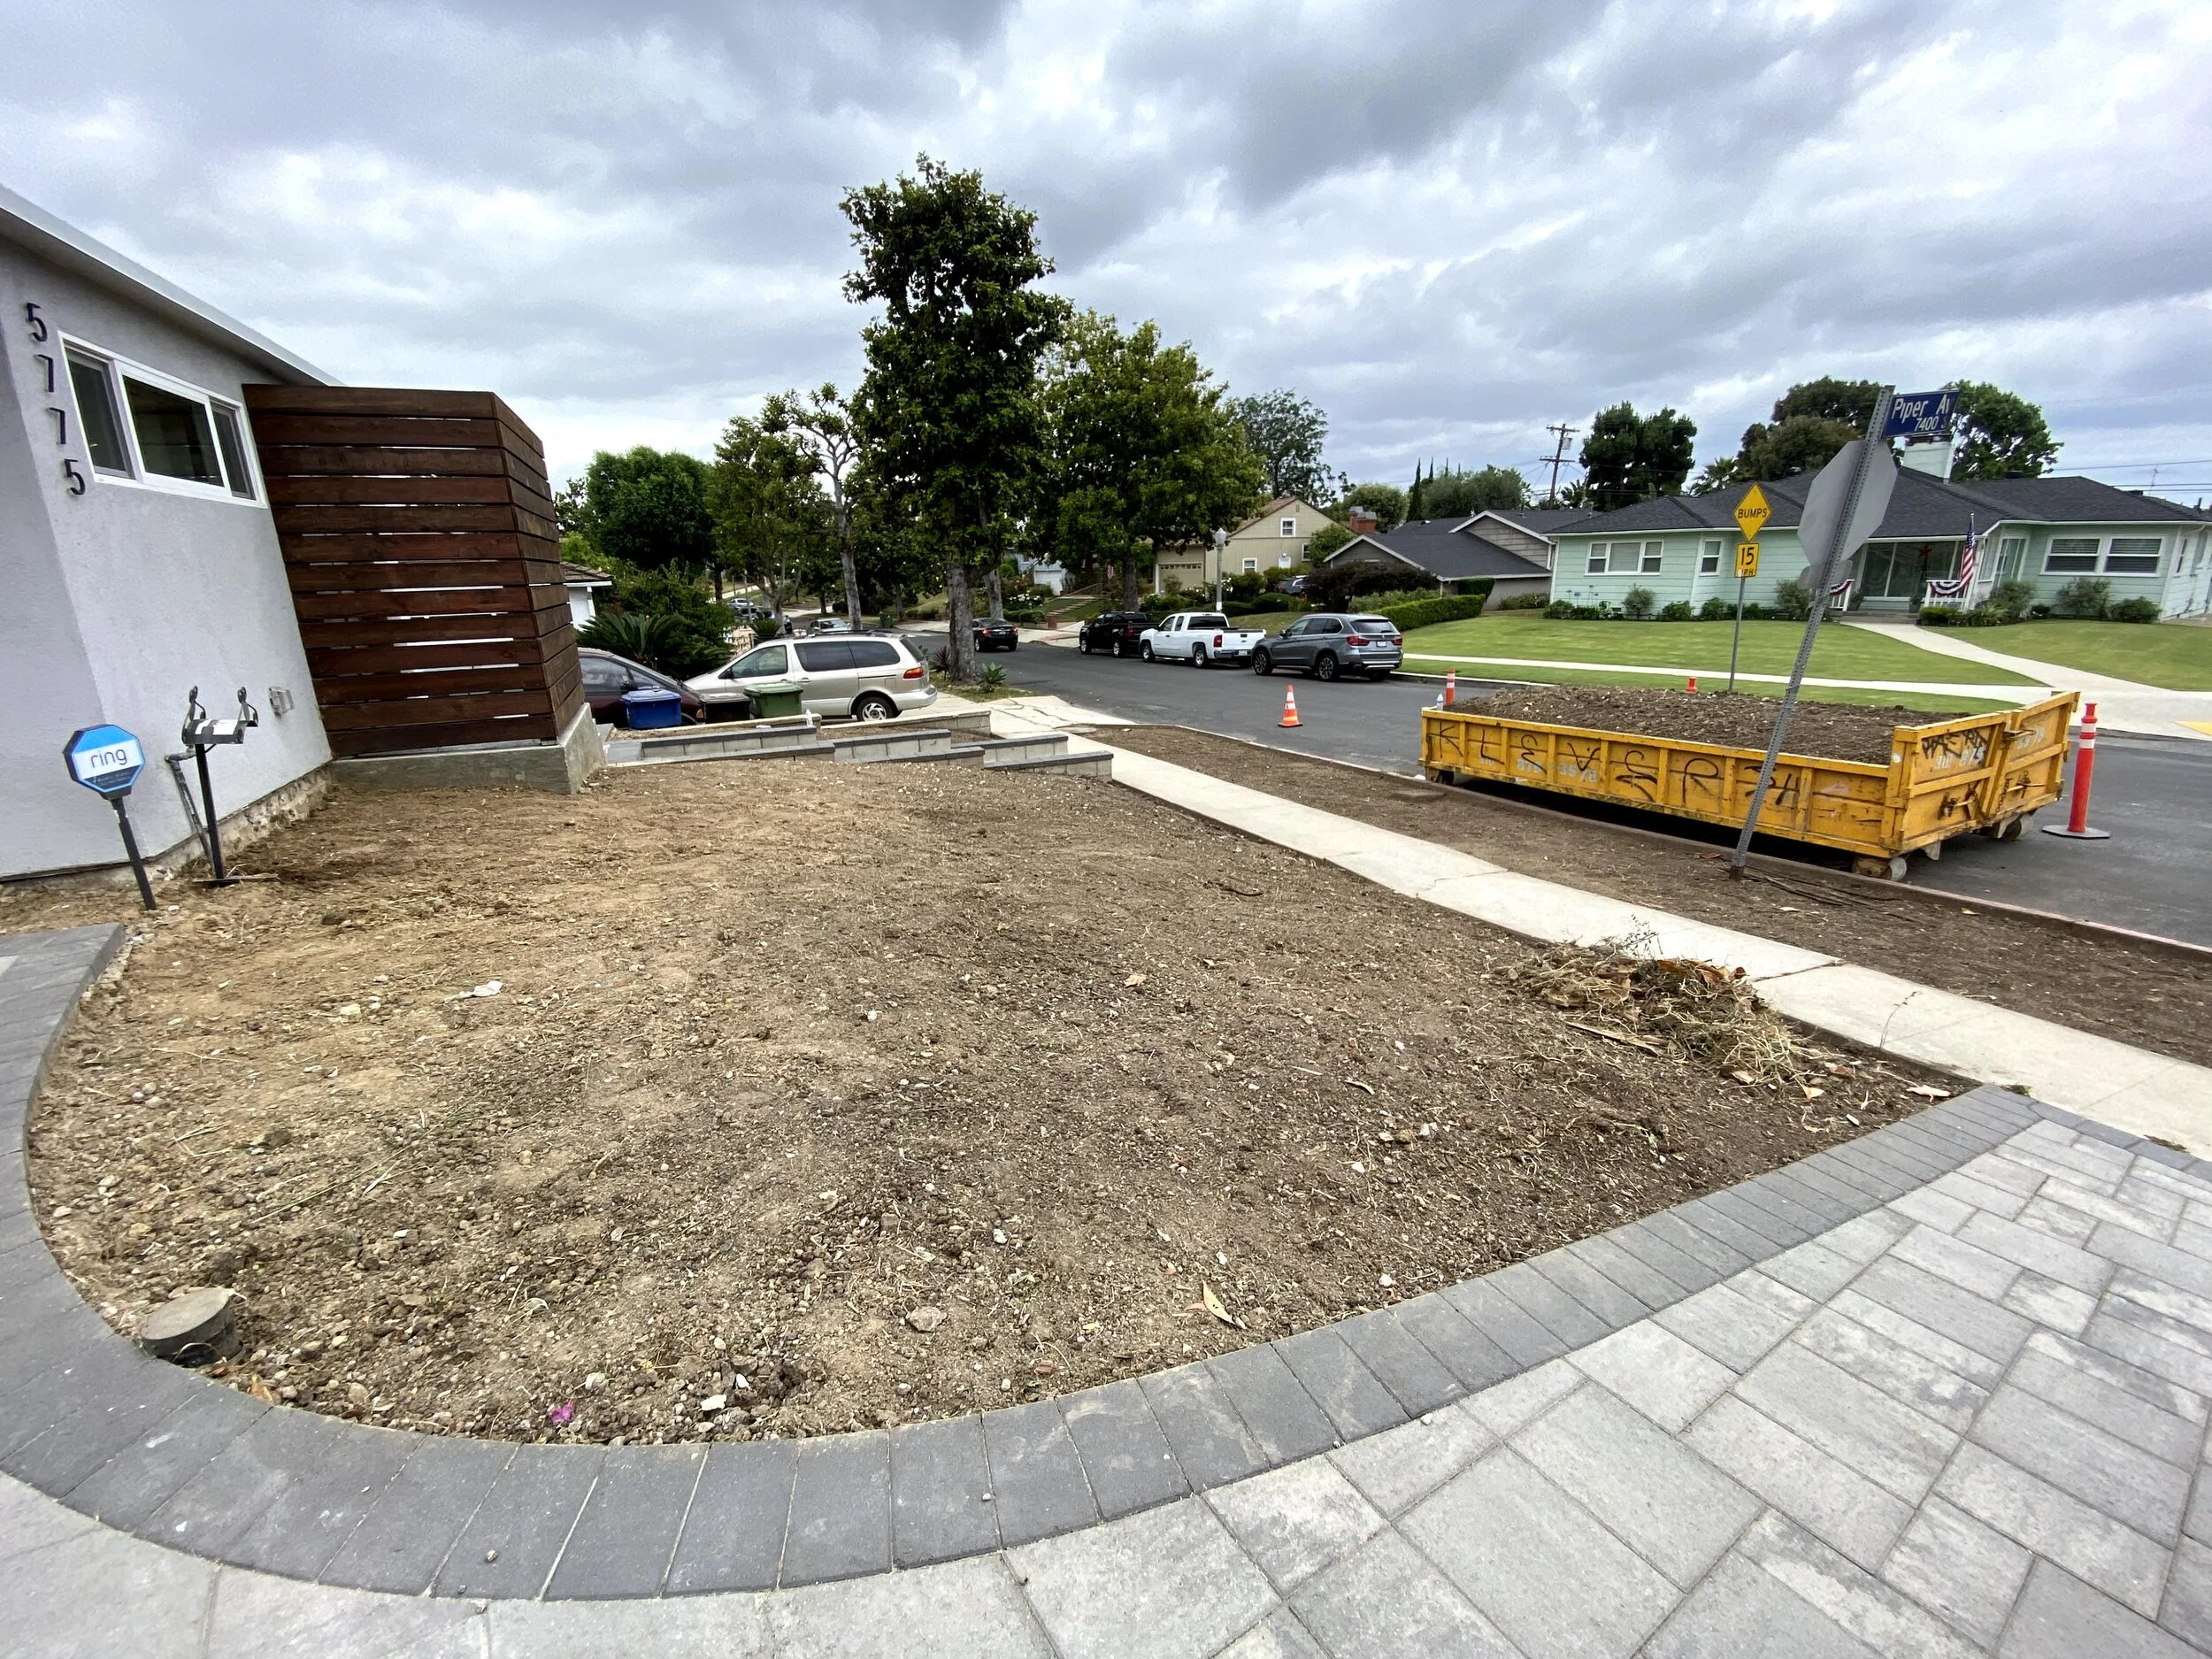
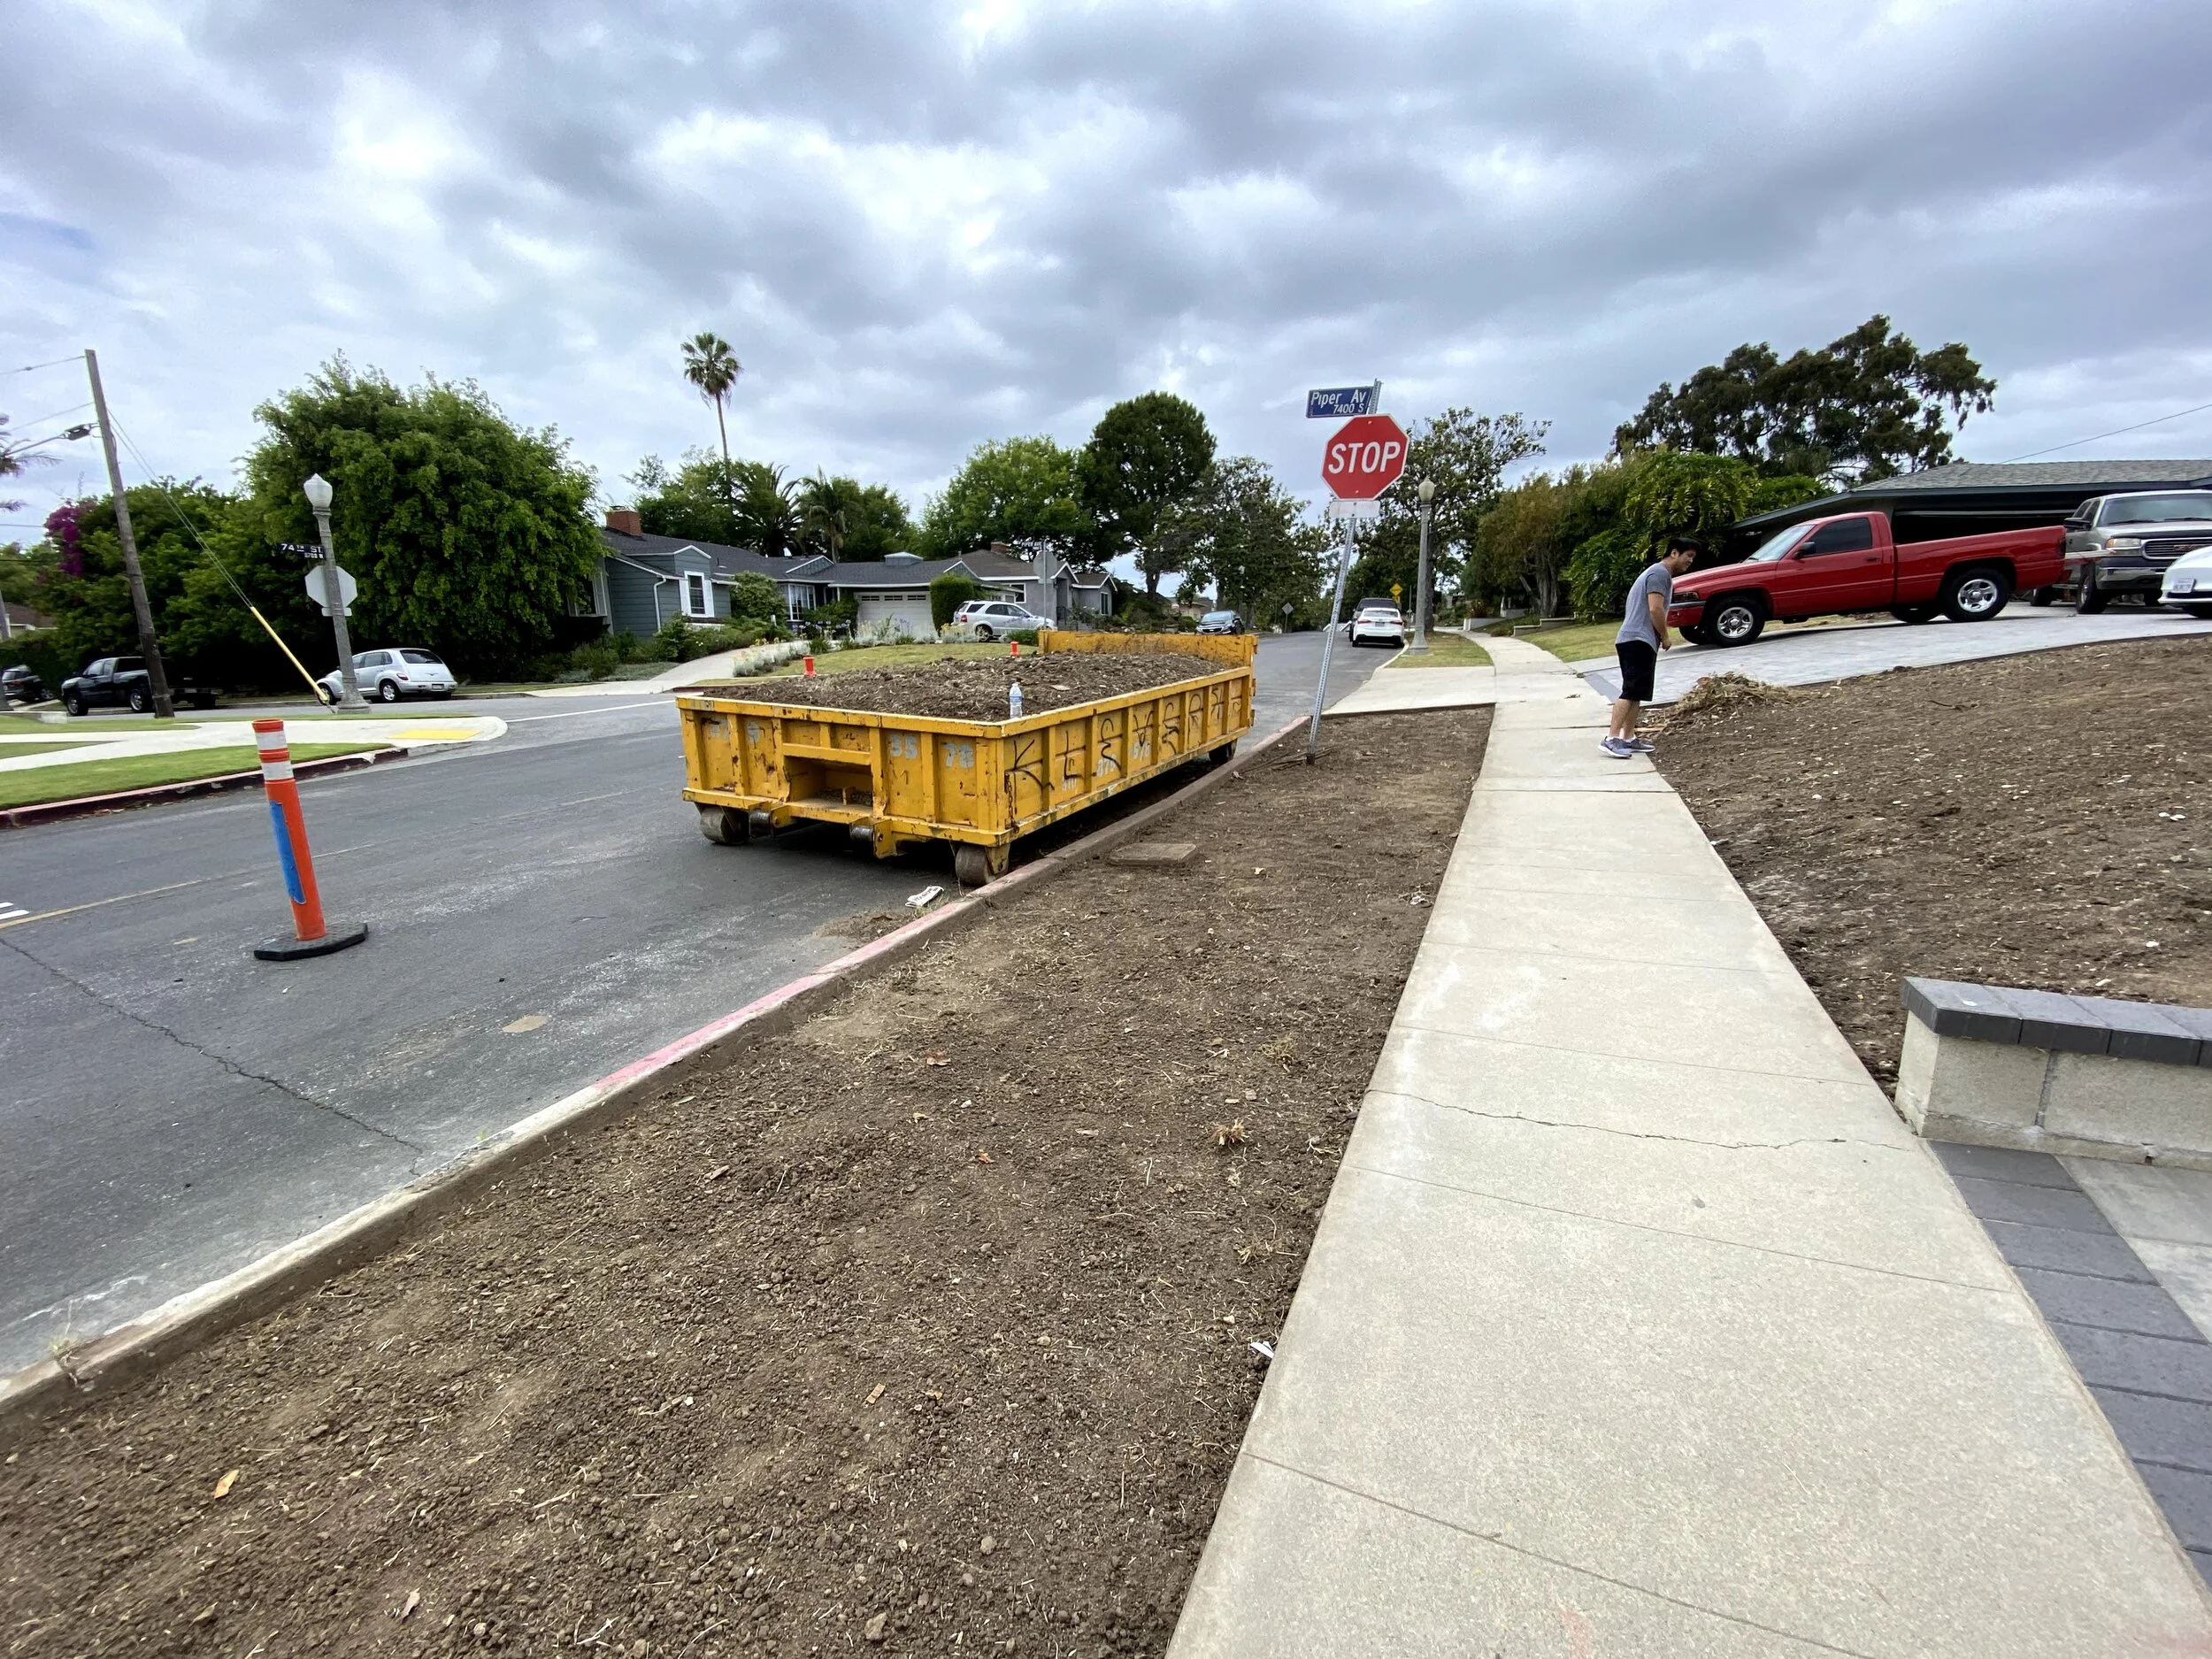
It was a 3-day job with a lot of manual labor. On the first day, a crew of about 8 guys came to clear all the weeds and level the ground by hand.

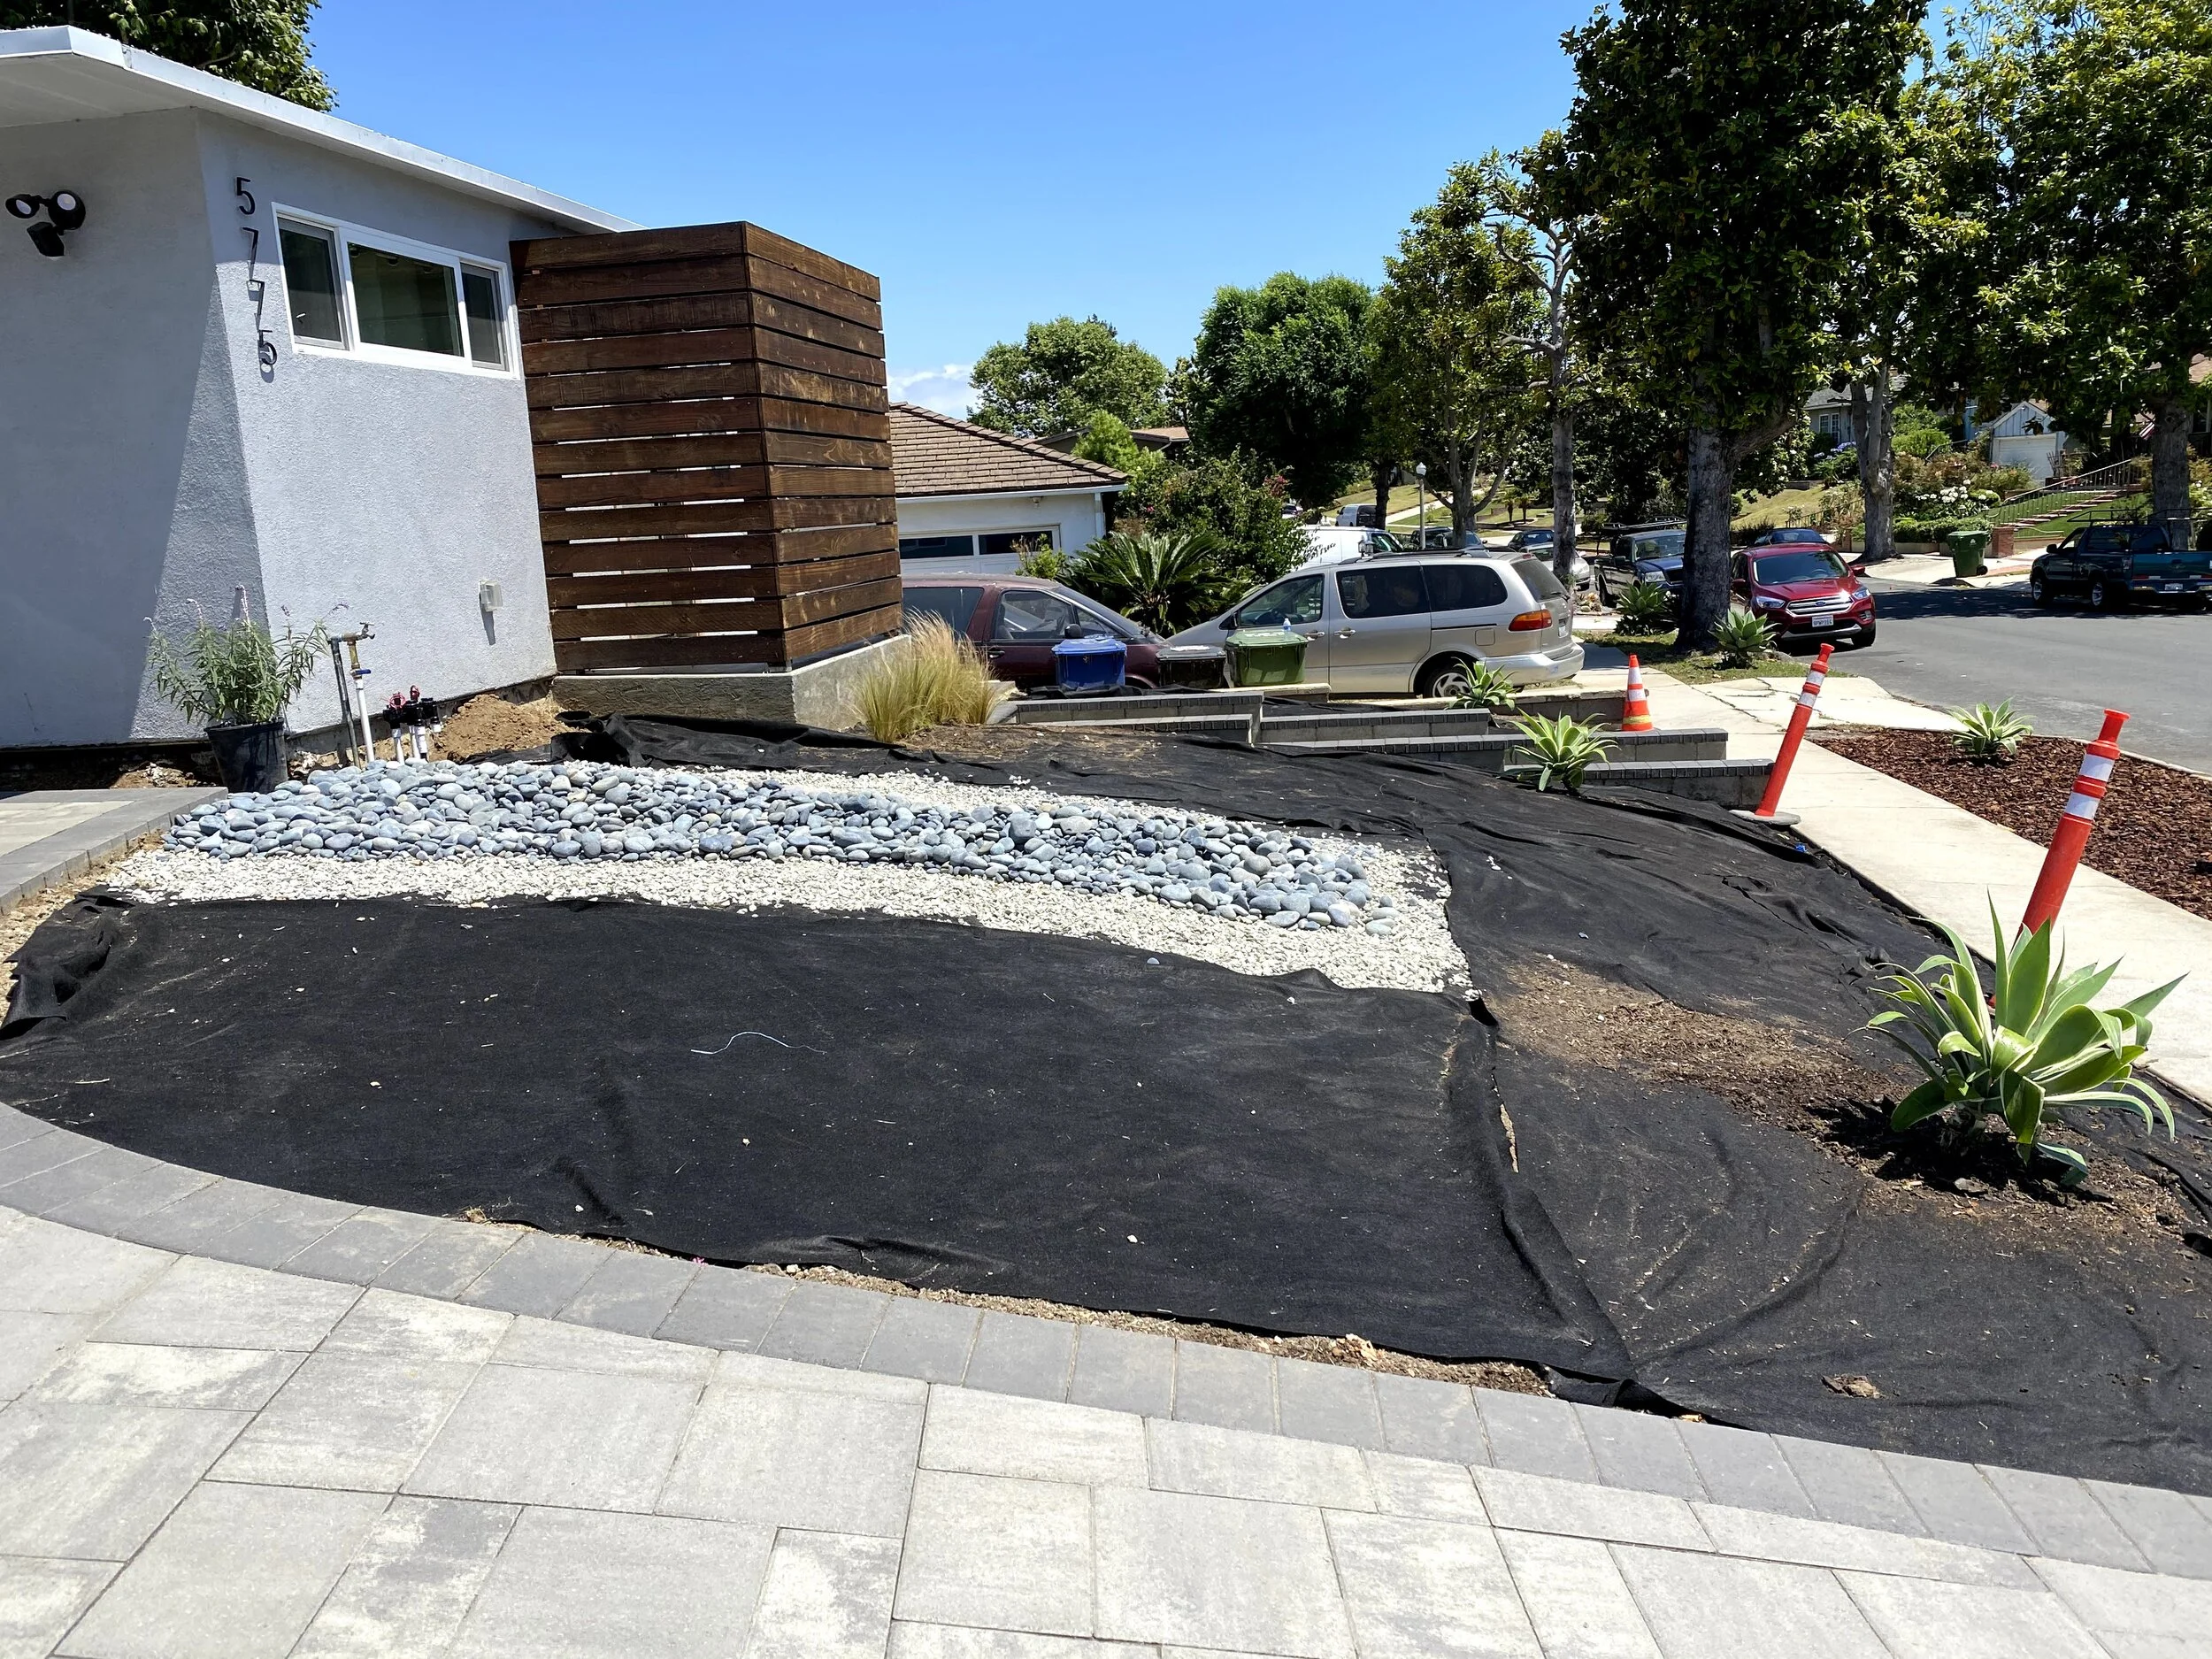
The second day was dedicated to laying down weed fabric and carefully planning and placing the river rocks. I kind of assumed they would just dump the bag of rocks on top of the dirt, but Anthony made sure it was carefully arranged with an aesthetically pleasing assortment of small and large rocks.

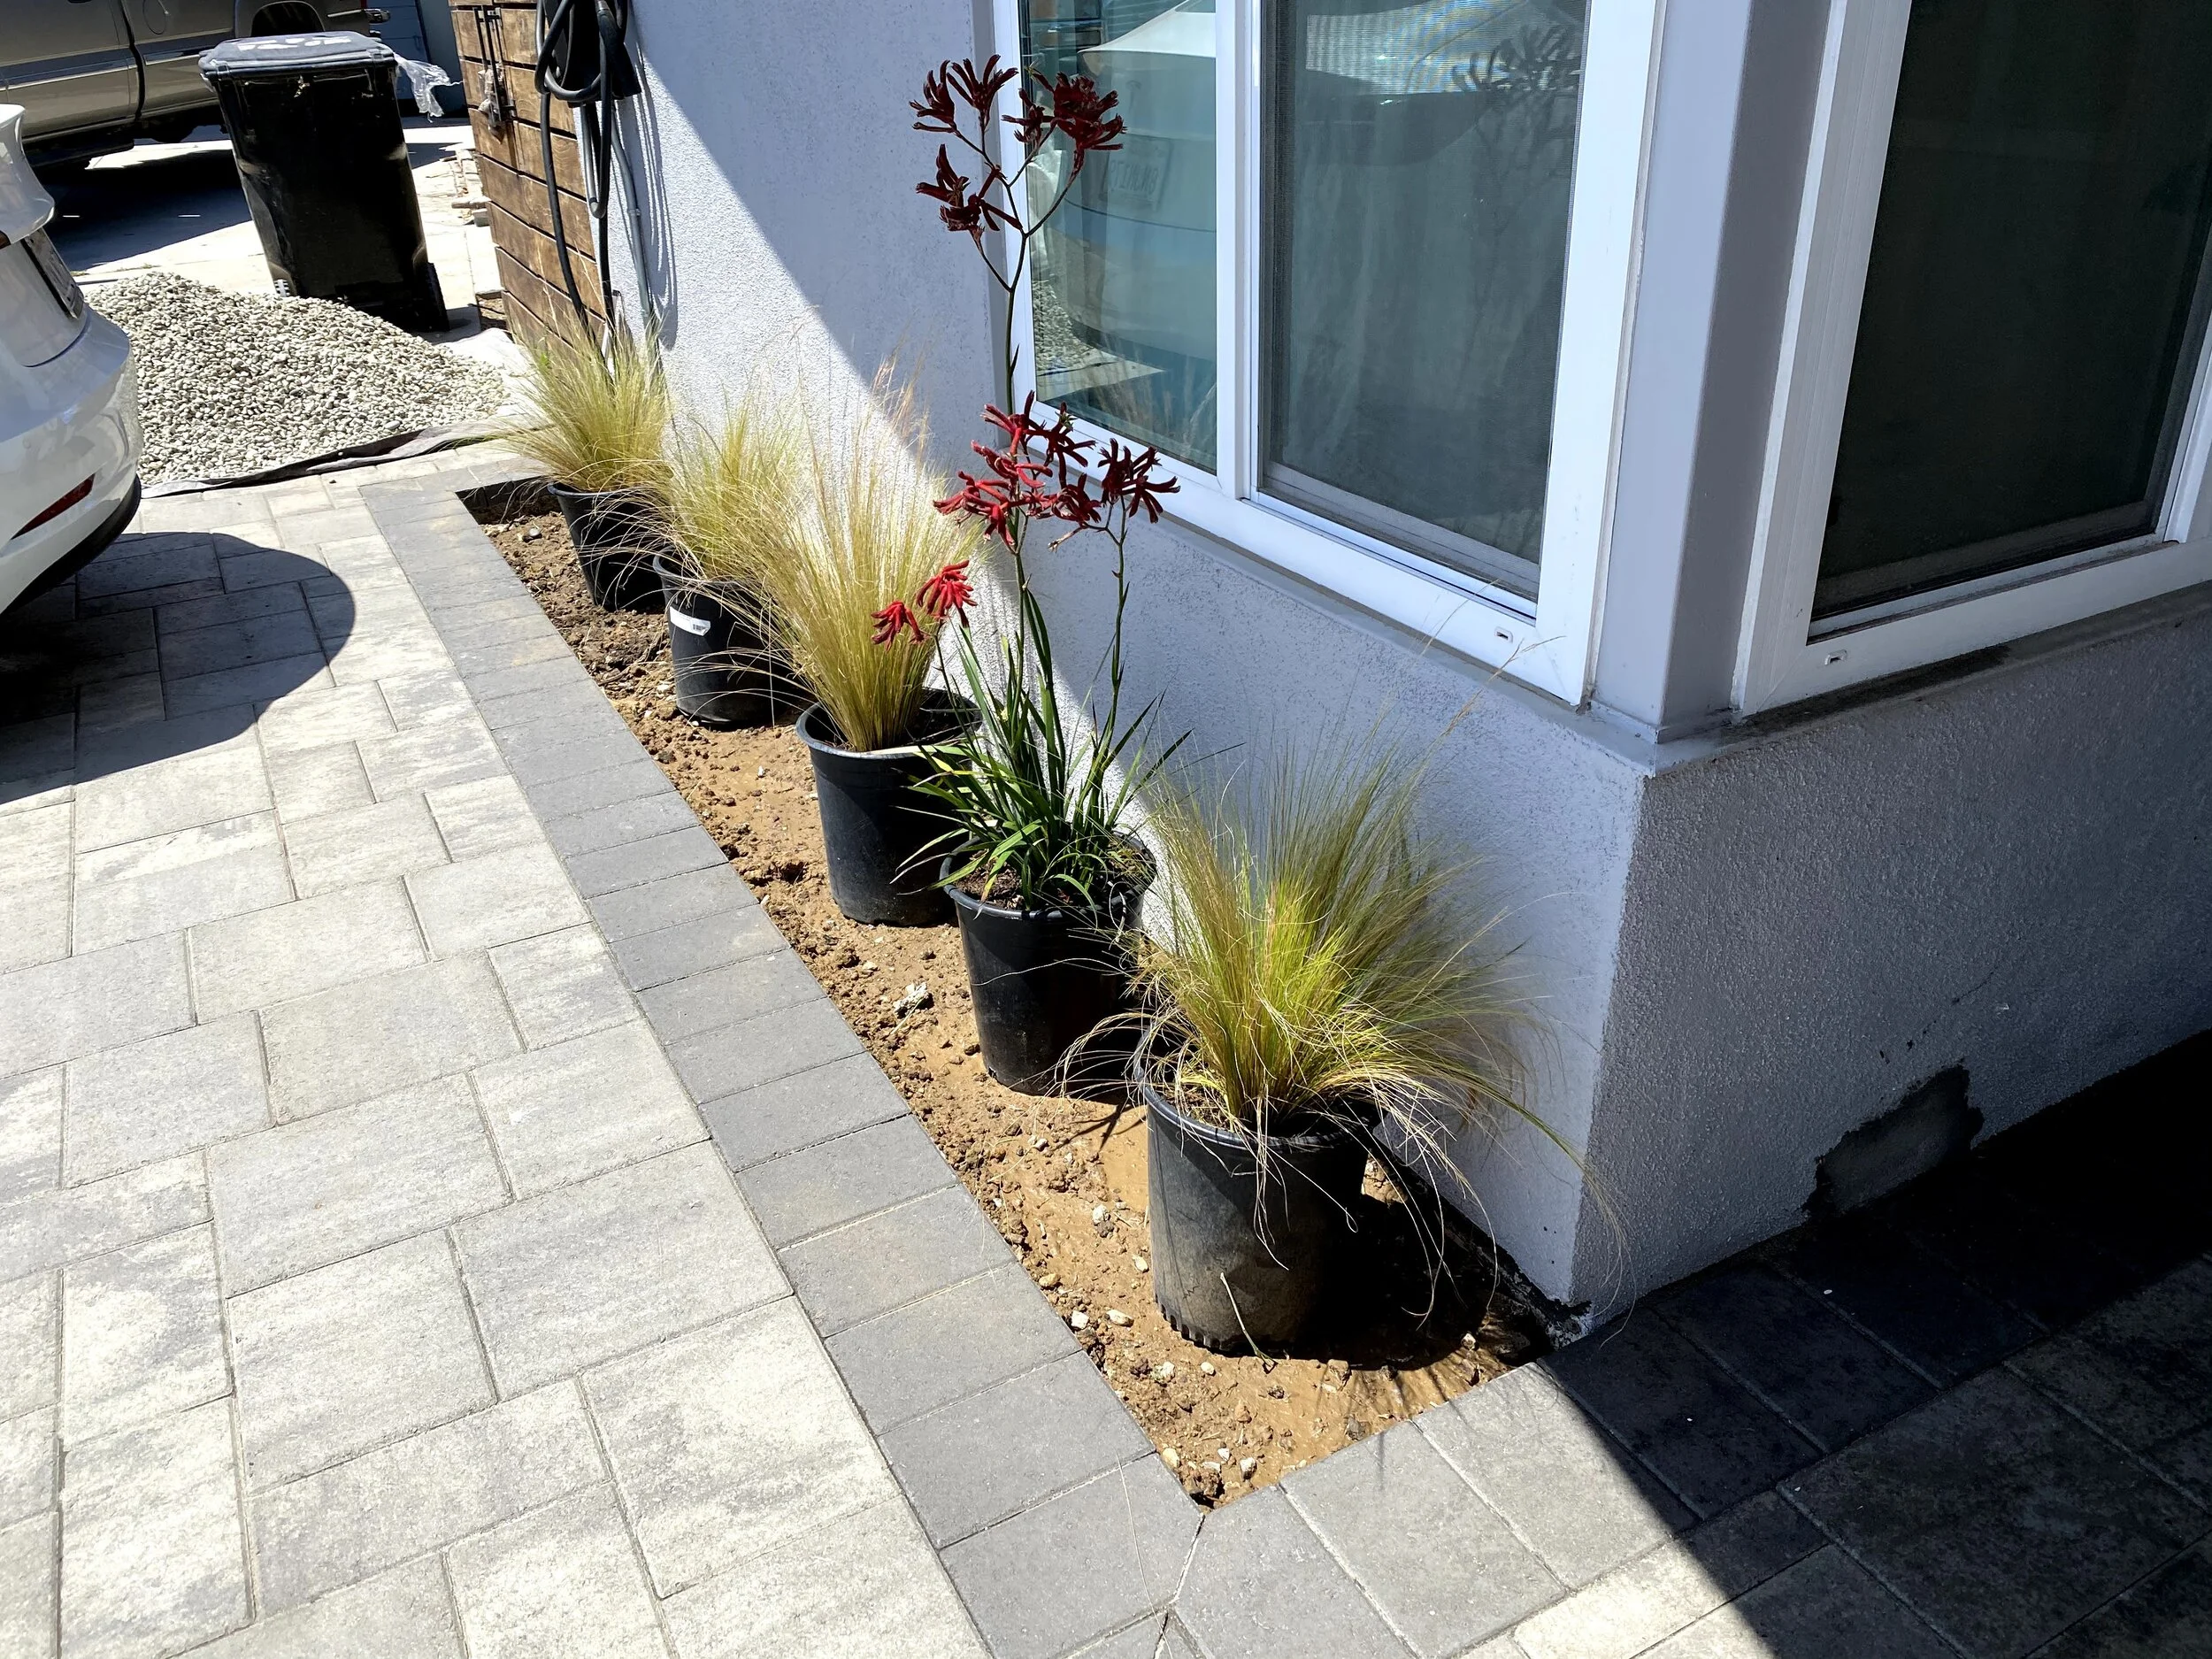
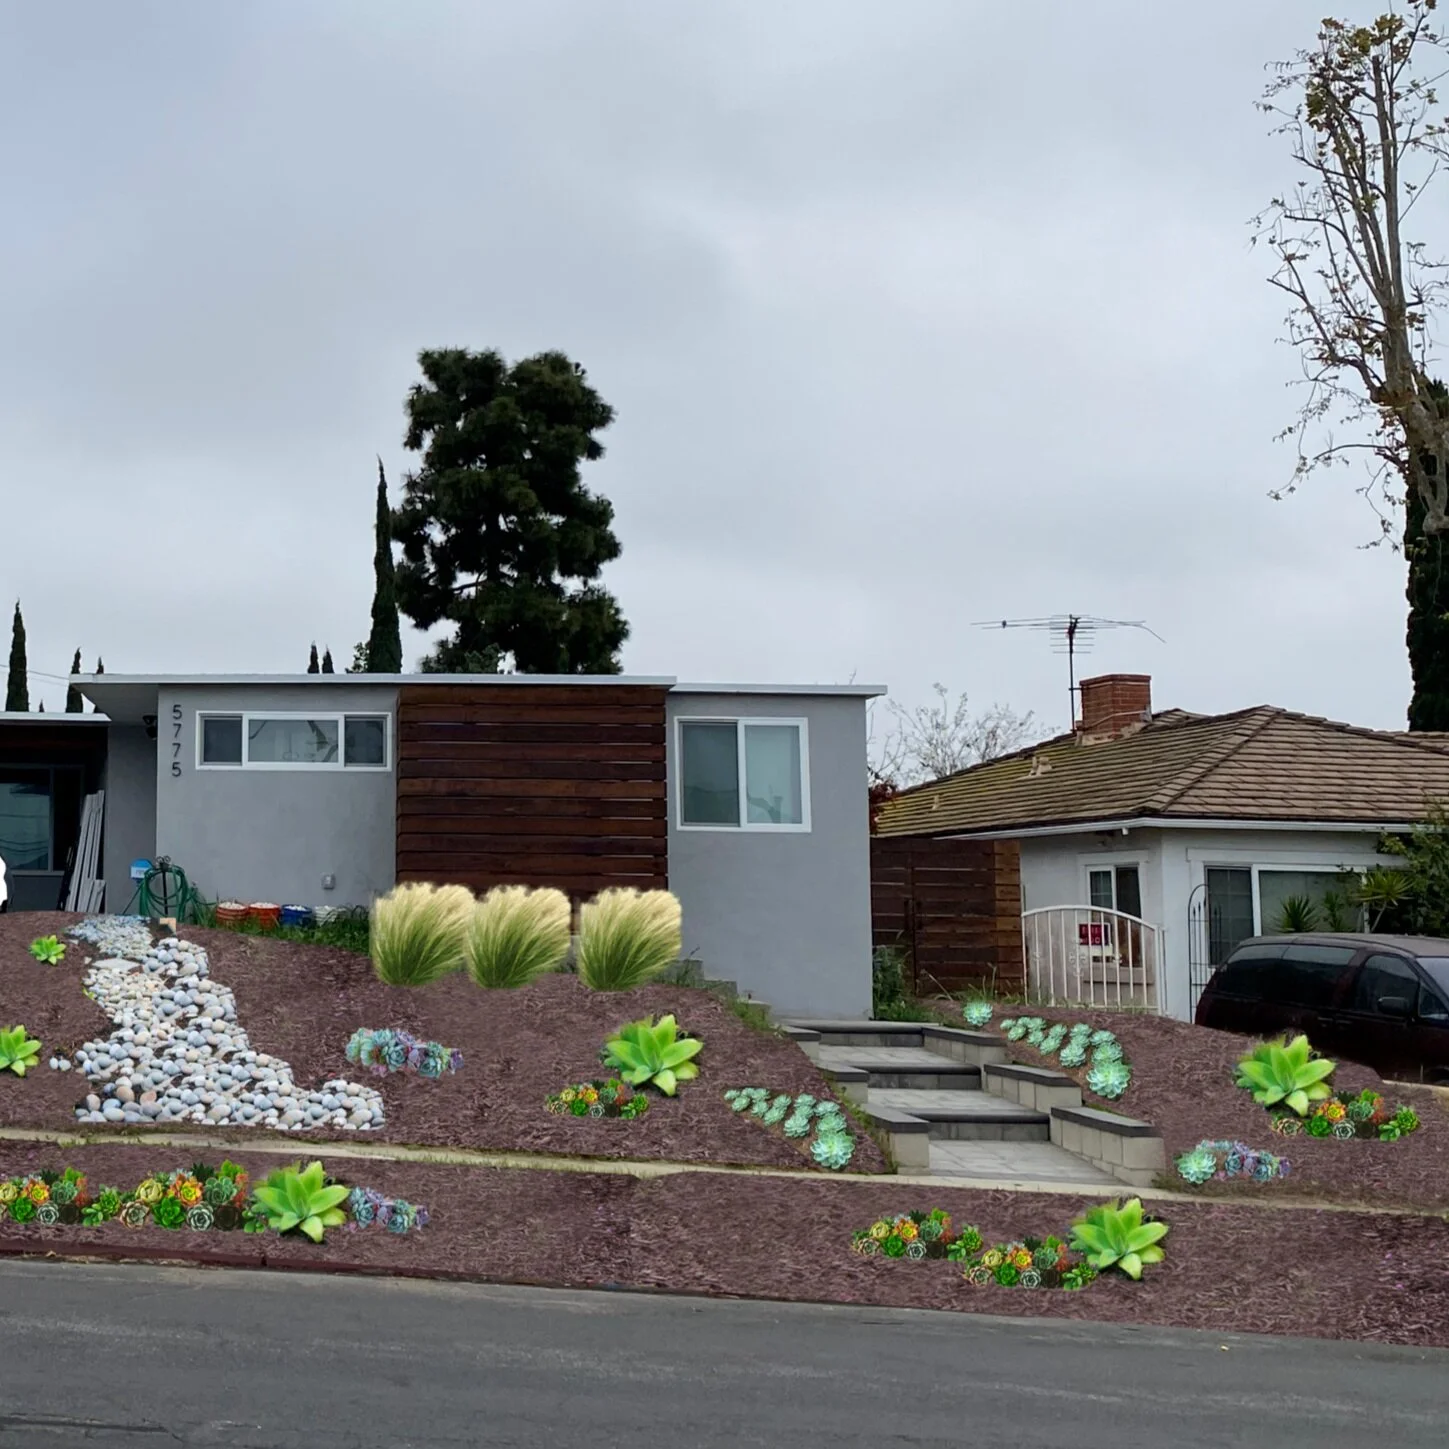
And finally, the third day was spent laying down the mulch and installing the plants. They look small now, but they’ll fill out over time. I’ve also been propagating succulents in the backyard, so we’ll transplant them to the front yard when they’re big enough.

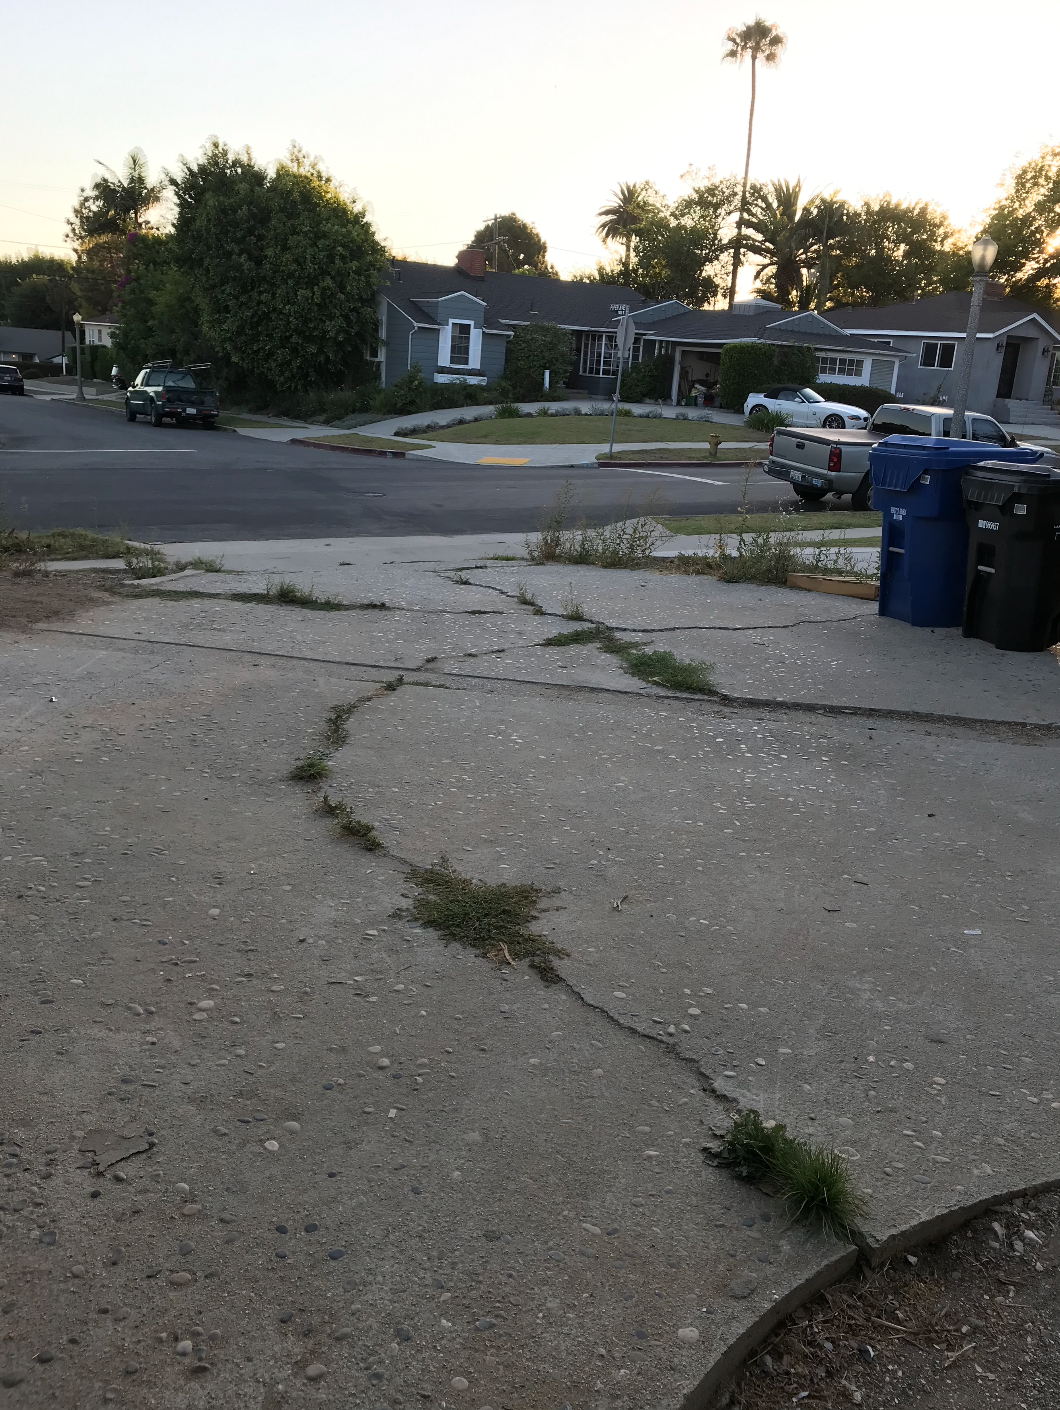
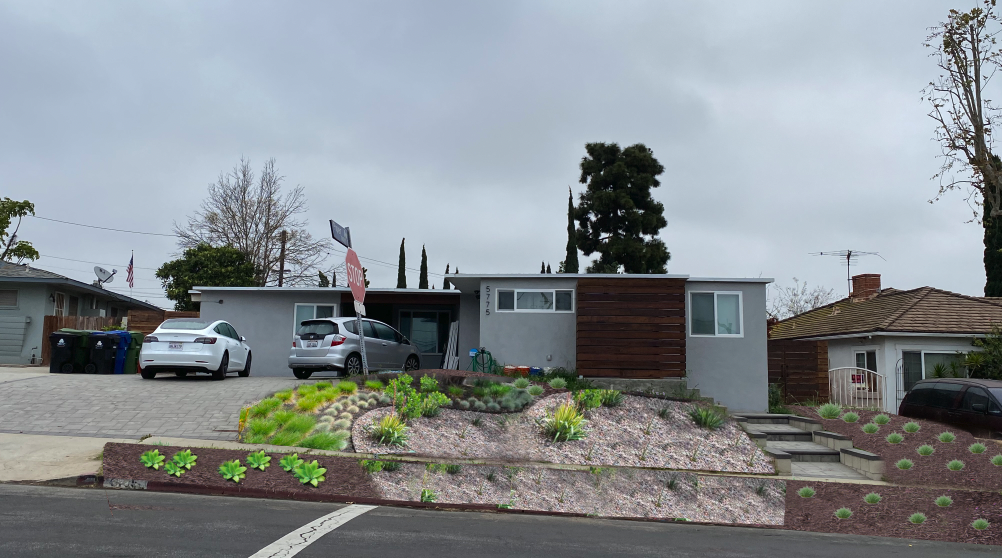
We’re so happy with the final result, and we’ve had lots of neighbors stop, stare, and share compliments. The curb appeal has made such a huge difference in making our house feel complete, and it feels like the whole neighborhood has enjoyed watched our little ugly duckling house since Day 1, blossoming into a beautiful swan that’s now the envy of the block (left: what the house looked like when we bought it, right: how it looks today).

Our Most-Used Newborn Products & Essentials

Maven is just about to turn 3 months old, and we’ve already learned so much about what we actually needed during this newborn phase. Of course there are the basics like a crib, sterilizer, bottles, and stuff like that. But these are some of our favorite nice-to-haves that we’ve highly recommended to our friends and family.

Baby Bjorn Mini Carrier

We’re big fans of anything Baby Bjorn. Maven is old enough now to be either back-facing or front-facing, and she loves coming along for the ride while we do chores or dance around the house. Sometimes she’ll even start sucking on the fabric. And if we want to change things up, I’ll carry her in the Moby wrap (I’m actually wearing her in it right now as I type). It’s easier for her to fall asleep in it because it’s like a long comfortable scarf.

Baby Bjorn Bouncer

When we need to give our backs a break or want to eat dinner more easily together, we’ll place Maven in this bouncer. Since it’s made of the same material as the Baby Bjorn carrier, it feels very familiar to her and sometimes she’ll fall asleep in it. We attached the Tiny Love stroller arch to it for more sensory stimulation, and soon she’ll be able to bounce herself in it.

Snoo

Ok, the hype is real. Maven consistently sleeps for about two 5-hour stretches during the night, and there have been a few times where she slept 9-10 hrs straight in this thing. It’s stylish, easy to assemble and clean, and has seriously given us a helping hand at soothing her back to sleep. Plus, it gives us a lot of peace of mind, knowing that she’s securely fastened throughout the night with no chance of rolling over onto her stomach. It’s magical.

Pacifier leash

I never realized how much pacifiers go missing or fall on the floor, but of course Amazon has a ton of options for pacifier leashes to solve this problem. We went with this one which came in a pack of two. The teething beads kind of look like a cute necklace, and Maven likes to practice grabbing onto them.

Breast shells

Another cool invention that no one tells you about. These have helped me save about 1 oz. of milk a day that would otherwise have soaked into my shirt and been wasted. Every day, Alex and I say out loud, “We’re so glad we bought these.”

IMG_4284.gif


Skip Hop Farmstand Playmat

We laid this out on the guest bed in the nursery, and Maven looks forward to it every day. We wiggle her arms and legs, brush different textured toys against her skin, and practice tummy time with her on this. I can’t wait to watch her start interacting with it more, learning the numbers, and being tall enough to play with the toys that hang from the top.


Skip Hop tub

We were tempted to get a foam flower sink insert (those pictures are sooo adorable), but after reading more reviews, we’re so happy with this Skip Hop tub (we have the gray one). We place it on the kitchen counter near the sink which makes bath time even easier and faster. She loves sitting in the little seat and hasn’t cried at all.


Kirkland Baby Wipes and Diapers

We’ve always been proud Costco shoppers and regularly went even before having a baby. After trying several diaper and baby wipe brands, we can confidently say that the Costco brand ones are our favorite. The diapers are durable, unscented, fit well, and have a cute print. The baby wipes are easy to pull out of the packaging, moist, soft, and large. Seriously, get them!

Installing Central Air Conditioning

It goes without saying that our house is a fixer. It’s been a labor of love and we’re slowly wrapping up the interior house projects (jk, it never ends). And so it was finally time to invest in central air conditioning. And like always, it had its fair share of surprises and big decisions.

When we bought the house, it didn’t have a gas line or central AC. For the past two years, we’ve been relying on fans, a semi-broken portable AC unit, and opening the windows. But now with a newborn, temperature regulation is a must.

Alex did his due diligence and got quotes from about 5 different installers. Ultimately, he decided on Southland for its highly rated reviews. However, it wasn’t as simple as going in and installing air conditioning. Since our house has a flat roof, it made things more challenging because there is no attic to hide the ducts. Which meant that if we wanted central AC, we’d have to place the HVAC system on top of the roof in a spot that could bear its weight, and then cut directly through the roof to connect the ducts into each room. The process would be invasive and aesthetically less pleasing. In fact, every installer warned that you would see the “elephant trunk” ducts on top of our roof and significantly impact our curb appeal.

The alternative was to install ductless mini splits in each room. Less invasive and more flexible, these individual units could be placed throughout the house with no impact to our roof. However, temperature regulation would be more difficult and we’d still have to install about a dozen throughout the house for the same price..

Alex and I weighed the pros and cons, and though we ran the risk of it looking ugly, we really wanted to have the reliability (and added resale value) of central AC. We initially scheduled to have the installation done before the baby arrived, but it rained on the dates we had planned so we postponed the project for 2 months.

To prep for the installation, I moved the furniture around in each room and covered it with painters plastic. Since we had done multiple walkthroughs prior, I knew generally where they would be cutting each vent. I wanted to make it as easy as possible for them to reach the specific wall or ceiling, and I wanted to minimize the amount of dust that would inevitably get on our furniture and things. Luckily, there wasn’t as much sawdust as I thought there would be, and the guys also added another layer of plastic on top of mine.

The job took 2 full days to complete so we spent the day at Alex’s mom’s house with the dogs. The guys started in the living room and kitchen on the first day, so we were able to come home at night, pull back the plastic, and sleep in our own bed. After they did the bedrooms on the second day, they carefully snaked the ducts very low to the roof so that it’s barely visible from the street. The HVAC now sits towards the back of the house on top of a bearing wall above the living room that can hold its weight. We were so impressed with their attention to detail and really appreciated their extra efforts to keep our house looking pretty.

The guys worked until 9pm on the second day to wrap everything up, vacuum, set up our Nest thermostat, and test both the AC and heat. It was a process and we had to make some last-minute changes to the vent placements, but in the end, we’re so happy with the results despite everyone scaring us into thinking we’d ruin our roof. A tiny part of me is a little sad that there are cutouts in our wood ceiling, but it’s a small price to pay for the luxury of central AC.

One Month Postpartum

On March 23, we welcomed our sweet baby girl into the world – Maven Ambria Chan. The past 4 weeks have flown by, filled with a newfound love for our baby, our marriage, and my body. It’s amazing how all your instincts just kick in, and it’s even more amazing to experience what my body is capable of and how quickly it has recovered. We’ve been savoring every moment as Alex is working from home full-time amidst the COVID-19 pandemic. I’m back on my feet and have even found enough time and energy to garden, make bread, and deep clean the house. Maven likes to tag along for the ride in her Baby Bjorn carrier like a little kangaroo.

Screen+Shot+2020-05-28+at+9.54.31+AM.jpg

Maven’s favorite things include stroller walks with the dogs, forehead kisses, long-sleeved onesies, warm baths, making purring sounds in her sleep, and snuggling and rocking with us in the Lazy Boy recliner.

What It’s Like Being 8.5 Months Pregnant During Coronavirus

I started my maternity leave last Friday. As I packed my desk, celebrated with cupcakes and cute baby onesies, and said goodbye (for now) to my coworkers, it felt reminiscent of quitting. Now, exactly one week later, it feels like everyone is on maternity leave with me.

IMG_0376.JPG

The first few days were slow yet productive. I kept busy with personal projects, house to-dos like prepping for air conditioning installation and gathering quotes for landscaping, and generally nesting. Meanwhile, many of my coworkers began working from home when my company encouraged a WFH policy for the rest of the month.

Then by Wednesday, Alex was also encouraged to work from home… and by the next day, it was mandated indefinitely. Now, it’s Friday and we’ve just returned from Costco. The lines were better than we expected, but it was still difficult to find a shopping cart and I was extra protective of my belly as people barrelled down the aisles. We snagged a box of diapers, but the baby wipes were out of stock. They were also out of chicken, but we picked up some salmon, pork, and brisket to vacuum seal in our freezer. Before this whole situation, we imagined I would be spending my leave to meal prep for the month ahead when the baby comes. Now, on top of that, we need to make sure we have the essentials too.

It’s quite bizarre to know that our baby will be born into a state of national emergency. We’re not scared, but the chain of events are escalating so quickly every day that we really don’t know what to expect or what our lives will look like in a month. For now, we’re just enjoying the extra time together as Alex is working from home by our side.

How We Converted Our Garage into a Rental Studio Unit

When we moved into the house two years ago, Alex always had a vision of converting the garage into a rentable studio unit for passive income. Admittedly, I was a bit hesitant to allow strangers into our brand-new unit and basically live under the same roof as us. But after almost 10 months of renting it out, I’m a huge proponent of Airbnb and would highly recommend it. Plus, a shared laundry room keeps the unit connected yet private from the main house.

IMG_3341.JPG

Here’s how we transformed our scary-looking garage into a bright, welcoming studio (also known as an ADU or attached dwelling unit) in 50 steps.

1. Hire a contractor and draw up ADU blueprints (beginning of April)

2. Submit blueprints to the city for approval and permits

3. Demolition (2 weeks) - clear out overgrown brush in the yard, remove the walls from the ADU to expose framing, dig 2 ft trench to create a crawl space for plumbing and electrical

LRG_DSC00349.jpg

4. Cancel out old, cracked pipes and run a new sewage line

5. Remove garage door

6. Frame out the windows

7. Frame the crawl space/floor

8. Remove the stone wall (start choosing plumbing hardware and front door) (end of April)

9. Pour concrete

10. Adjust electrical (early May) - for a couple days, they turned off the power for a few hours

 11. Frame the floors (Early May)

12. Frame the walls and roof (mid May)

13. Buy front door + interior doors

14. Exterior framing + bathroom framing

15. Set up electrical (end of May, early June)

16. Decide on bathroom tile and laundry room tile (mid June)

17. Purchase tile, bathtub, toilet, fireproof laundry door, kitchen (mid June)

18. Concrete stoop is installed (2-3 days)

19. Drywall is installed (1 week)

20. Choose interior and exterior paint colors (mid June)

21. Purchase baseboards and door trim

22. Purchase sink

23. Purchase exterior lights

24. Purchase door handles

25. Purchase bathroom subway tile and choose layout, grout color, and sanded or unsanded grout

26. Sand exterior beams above door

27. Crew turned off water for 1 hour to install pipes (end of June)

28. Crew primed the interior and exterior, then applied 3 layers of paint

29. Subway tiles installed

30. Kitchen and fridge delivered

31. Install front door

32. Wood delivered for the two fence doors on the side of the house

33. Choose grout colors

34. Floors went in

35. Install bathroom sink and shower door

36. Install washing machine and dryer in the connecting laundry room

37. The electrician came on a Sunday to work on all lights + switches + floodlight

38. IKEA kitchen cabinets installation (beginning of July)

39. Install Ring Video Doorbell and porch lights

40. Stained beams and side fences with Albert

41. Fabricator remeasured kitchen cabinets before installing countertops

42. Countertops were installed

43. Kwikset Smart Lock was installed at the front door

44. Upon installation, we discovered that the downdraft hood vent we got from Sears Outlet was missing the actual vent. Alex spent his entire day calling manufacturers and trying to find the missing part, but instead opted to purchase a new downdraft vent altogether (mid July)

45. Move my old college bed into the ADU + purchase kitchen items from IKEA

46. We created the Airbnb listing, started writing a description, and researched how to be a superhost

47. Downdraft hood vent FINALLY arrives after 2 weeks of waiting (and countless hours of Alex arguing with manufacturers and customer service)

48. Final inspection!

49. Clean clean clean.

50. Take pictures and list the unit on Airbnb. 

Screen Shot 2020-03-17 at 12.16.41 PM.png

Like any house project, there were hiccups along the way, but nothing as stressful as our initial home renovation. This time around, we had a very clear design vision, budget expectations, and felt much more familiar with knowing which questions to ask and what terminology to use. All in all, it was about a 20-week project (you can see exactly where we started here). Working on the house will always be a labor of love, but one that really brings out the best teamwork between Alex and myself.

Our New Driveway with Concrete Pavers

Remember that cypress tree in our front yard that wreaked havoc on our plumbing? Well, it did a number to our driveway, in addition to years of general wear & tear.

So when we came back from our trip to New Zealand, we got started right away on demolishing the driveway.

As we did our research, we decided on concrete pavers. They’re basically like tiles that can shift more easily as the ground changes over time, rather than a slab of concrete which is more prone to cracks. We took a trip to a couple landscaping specialty stores to see samples in person and poured over a Belgard catalog full of colors and configurations. We chose the “Rio” blend paver in an ashlar pattern.

We also added stairs leading up to the garage unit to give it a proper entranceway up the slope of our front yard. This area gets mistaken for the front door sometimes, but some plants and pathway lights should help guide people towards the actual front door.

Our curb appeal and entryway are slowly coming together. Next up… landscaping!

Garage Conversion Week 19

We’re in the final stretch of the ADU. We had our final inspection on Friday, which the inspector failed for a few silly reasons that are easy to fix. For example, he wanted us to add a motion sensor light to the laundry room. He wanted us to have only 3 stairs on the stoop instead of 4 (otherwise we’d have to add a railing), so we simply buried the 4th step with dirty.

And he wanted us to include a “1/2” to our address number since the garage is registered with the city as an add-on to our main house. We went to Home Depot in search of the “1/2,” but of course they didn’t carry it (and neither did Amazon). So we got creative and bought two 1’s and a 2. Then our contractor removed the top portion of the “1” to turn it into a “/” and lightly screwed it into place so we can pass inspection and easily remove it afterwards.

We also installed the backsplash, towel rack, curtains, paper towel holder, organized the bathroom toiletries in glass amber jars, and laid out some hand-washed dishes to dry on our super lightweight and compact microfiber rack.

Garage Conversion Week 18

Minimal work was done on the ADU this week because it’s basically wrapped up. We’re just waiting for the downdraft hood vent to arrive (should be coming tomorrow) so we can install it. Our contractor will also add a few finishing touches, like the bathroom mirror and toilet paper roll holder. Then, voila! Inspection will happen, hopefully everything gets approved, and then the room will be ready to go!

Did we mention that our bathtub is huge? The single glass pane shower door went in last week. We’ll test it out this week to see how much water splashes out, but it should be minimal because the tub is oversized and will catch most of it.

The rest of our entire weekend was spent organizing and cleaning (and we didn’t even finish everything on our to-do list). It’s getting to the point where we’re ready to hire cleaners. The amount of time it takes to clean and sort through everything could be used towards freelancing or other weekend plans. And since we’ll be renting the room out on AIrbnb, it makes more sense to hire a cleaner than to do it all ourselves.


We’ve already listed it on Airbnb and have been researching how to become superhosts. I’ve also started listening to Zillow podcasts and educating myself more about real estate. 

Garage Conversion Week 17

We started our weekend by returning the downdraft hood vent at Sears Outlet. They gave us a full refund which reminded us about something no one ever tells you about home renovations: SAVE ALL YOUR RECEIPTS. You never know when you’ll have leftover tile, extra unopened paint, or wrong models of hood vents that you’ll need to return a few months or even up to a year later.

We made a stop at Costco to start gathering things for the garage like a fire extinguisher (and one for ourselves too, finally).

We also swung by Armstrong Nursery to pick up much-needed Dr. Earth organic plant food, spikes for the peach tree (it’s getting so heavy with peaches!) and spent the weekend tending to our garden.

Finally, we went to IKEA and bought new queen size MALM bed for guest room (on sale for $109) and scored a watering can that was on sale for $5! We assembled it as soon as we came home, moved my old college bed (our previous master bed) into the garage, moved around the furniture in our bedroom, and finally reorganized the guest room to accommodate the larger bed (previously we only had a full bed there). The house is feeling more complete and adult-like every day.

Garage Conversion Week 16

After last week’s debacle, the IKEA cabinet installer came back to extend the back of the cabinets by 3 in. This will help stabilize the kitchen counter overhang. In everyday terms, this means that guests can sit on the bar stools without worrying about the counter crashing down on their legs. Pretty important.

A couple days later, the fabricator came back and the countertop finally went in on Tuesday. It’s a marble-looking soapstone that’s reminiscent of the Pental quartz we have in the main house (yet significantly cheaper).

Our new West Elm mod platform bed ( 20% off for July 4th!) arrived, and it was definitely the highlight of our week (and still is). We were so excited to upgrade our bedroom and bring some style and order to the space. The delivery guys also came in to assemble it, and we bought a new king-size Tuft & Needle mattress.

To make room for our new bigger bed, we donated at least 5 boxes of stuff to Goodwill and 2 boxes of clothes to ThredUp. I’ve been reading Remodelista: The Organized Home by Julie Carlson and Goodbye, Things by Fumio Sasaki which has helped me a lot with letting go of stuff that have served their purpose.

IMG_1553.jpg

Towards the end of the week, the downdraft hood caused lots of problems all over again. Alex spent the majority of his day figuring out how to resolve the issue. In short, we discovered that the downdraft hood vent we got from Sears Outlet was missing the actual vent. So Alex spent his entire day calling manufacturers and trying to find the missing part, but instead opted to purchase a new downdraft vent altogether. This has been the hardest part about the garage renovation, and In the future, we’ll be sure to avoid the downdraft vent.

Garage Conversion Week 15

This week marked the beginning of the IKEA kitchen cabinets installation. As we expected, it hasn’t been the smoothest experience and likely the last time we use IKEA for custom cabinets.

Pros: 

The IKEA software is easy to use and quite advanced. It gives you a great 3D rendering of how the cabinets will look, including opening the doors to see how the drawers will pull out. Everything is modular and fits together neatly. We went to the store a few times to talk it out with an IKEA kitchen consultant before placing our order. Plus, they gave us a heads-up that the 10% off kitchen sale was happening in a week, so we were able to take advantage of getting a few hundred dollars back.

Cons:

When it came time to place our order, it was chaotic (like any big IKEA purchase tends to be). The kitchen consultant takes the mouse from you, clicks around to double check everything, and then escorts you to checkout. Meanwhile, an unsupervised child was running around us and printing out an excessive amount of pages (and we happened to be standing right next to the printer). It was really annoying and distracting, especially when we were in the middle of making a big purchase. A few of the pieces were out of stock too (like the drawer handles), so we had to pick them up from another IKEA location.

In the next few days, Alex received phone calls to schedule the installation and fabrication appointments. They were booked up more than we would have liked, so the earliest appointment we could snag was in 2 weeks. Luckily our contractor said it was ok, but it was still a little inconvenient.

The day before installation, we didn’t receive a phone call to confirm. So Alex had to call customer service himself and get redirected a few times before solidifying the installation time. On Monday morning, two installers arrived. But as they were placing everything in, they realized they were missing a couple pieces. So Alex had to go back to IKEA again and purchase the additional legs needed (a $7 purchase that took 2 hours of his day).

And like we expected, the drop-in cooktop caused a headache (and is still continuing to be an issue). At first, it didn’t fit and couldn’t drop in even though it was an IKEA brand cooktop. So the fabricators came back and cut more of the cabinets to drop it in smoothly. Then the downdraft hood needed special measurements so the fabricator had to come back twice to figure out how to get everything flush against the counter. As of today, we’re waiting to hear back on their recommendation for extending the cabinets.

While all the kitchen drama was happening, we got the side fences installed – which means we can finally let the dogs run freely around the backyard! To celebrate, we hosted a 4th of July barbecue for about 15 friends. Alex was so excited to grill burgers and bacon wrapped hotdogs, while I made a strawberry pie, sangria, and showed our friends around the ADU.

Our good friend Albert also stayed with us for the weekend and helped stain the wood fences and beams. In return, we grilled him a fat rack of Costco ribs. :)