Before & After: Our $200 Exterior Entryway Makeover

After many morning runs around the neighborhood and seeing our neighbors’ landscaping, we knew we needed to step up our game. And with Halloween and the holidays right around the corner, we wanted our home to be a little more presentable. We’ve been talking about it since we moved in May, but now that things have slowed down a bit after the wedding, we finally brought the vision to life.

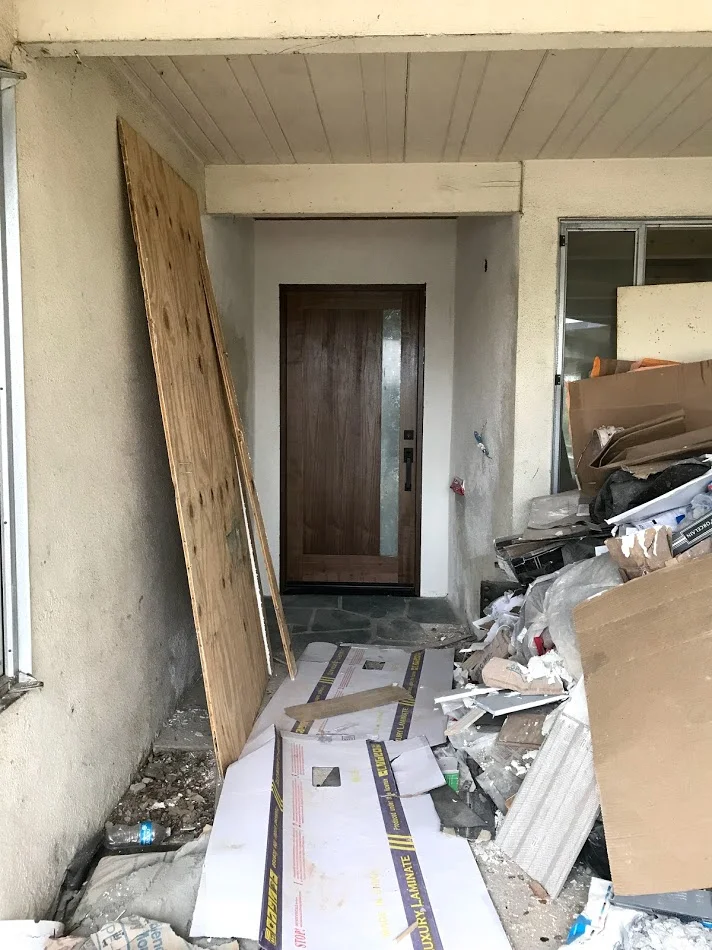
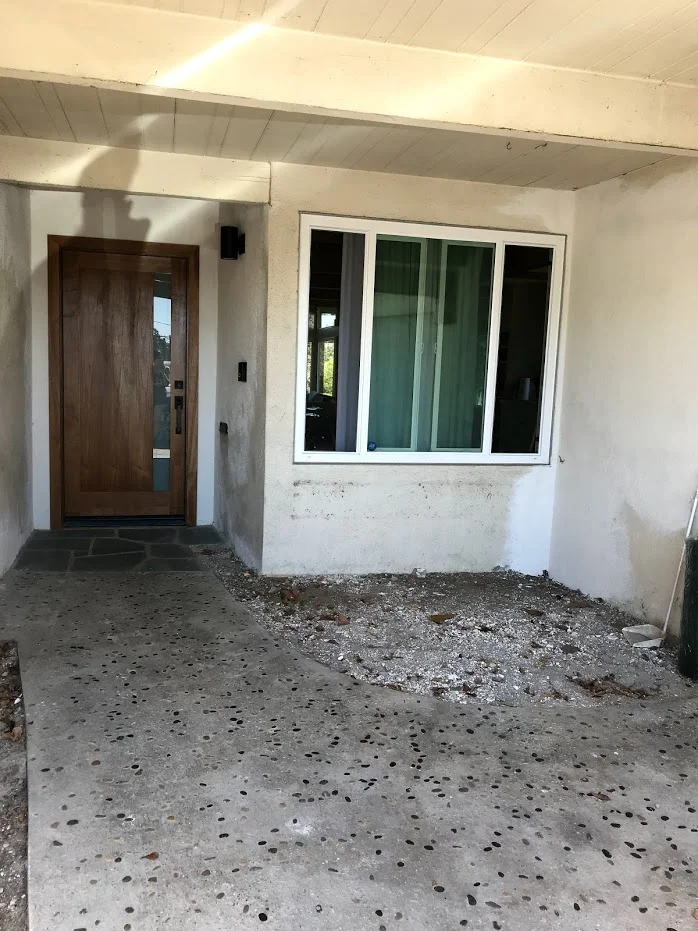
This was what the entryway looked like when we bought it, during renovations, and post move-in. Not cute.

Our budget was $150. I wanted to keep it modern and low maintenance: a container garden with lush, low-light plants in black pots and white gravel (in anticipation that we’ll be eventually painting the exterior of the house gray).

Pinterest gave me a couple ideas [source 1, source 2 unknown]

Our first haul from Home Depot cost $160. This included 9 bags of white marble chips, 7 low-light plants, 1 large bag of potting soil, and 5 containers.

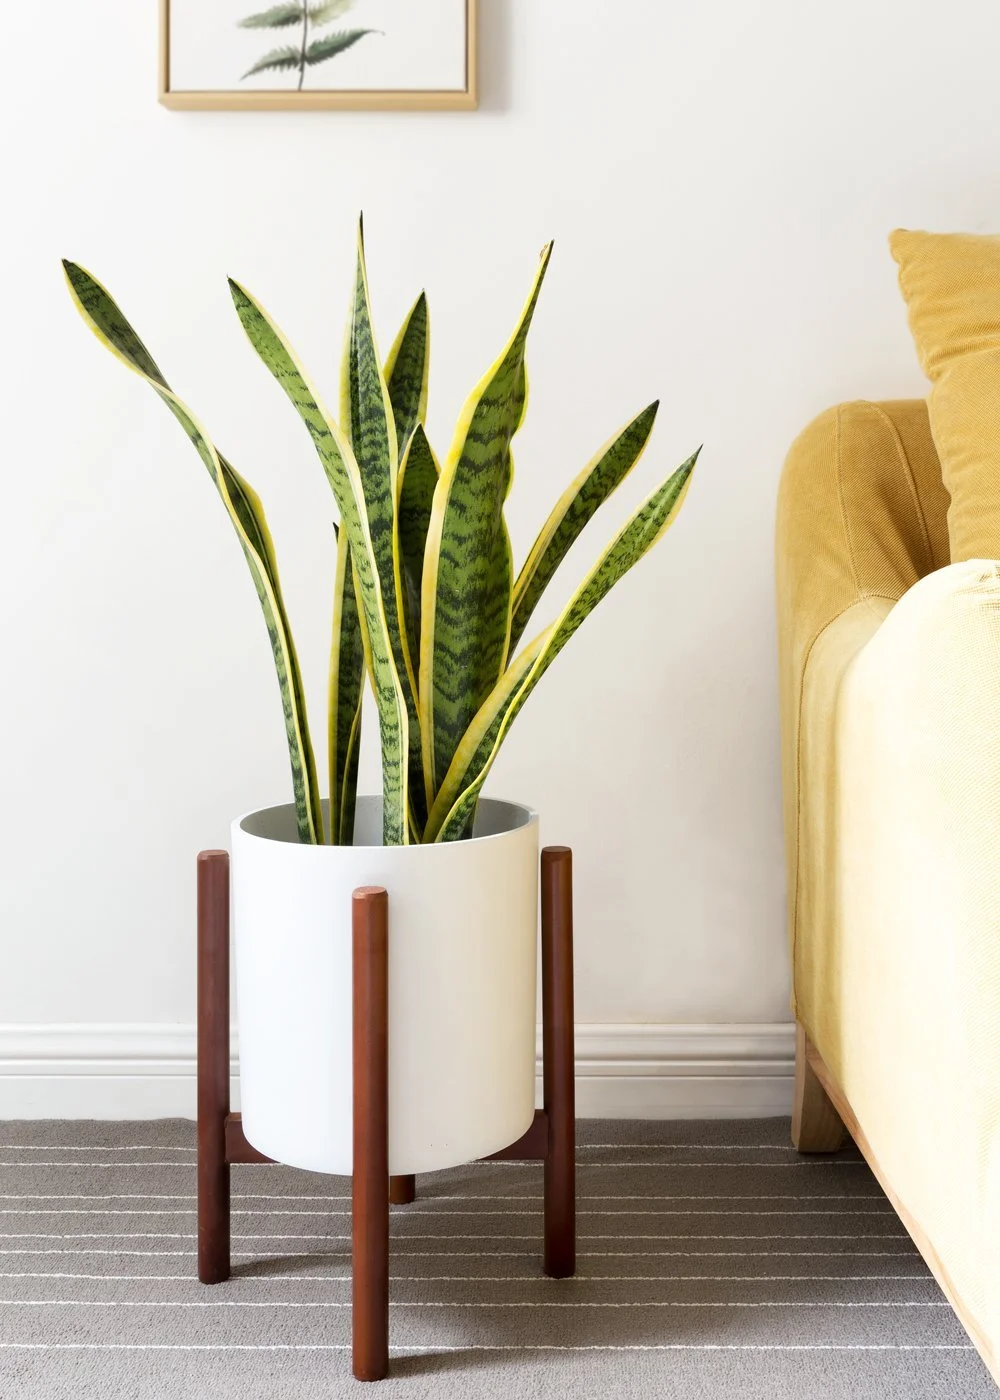
Plants purchased included a snake plant, ivy, and croton petra, to name a few.

We started by shoveling the layers of dust and debris into the garbage can. And let me tell you, it was dusty. We had to wear goggles and face masks. In the process, we unearthed nails, glass, and seashells — remnants of the previous owners’ attempt at landscaping.

Then we leveled the dirt with a rake and Alex power washed the dusty sides of the house and walkways. After it dried, he placed a layer of cardboard over the dirt to keep the dust a little more controlled. And then he poured all nine bags of gravel over it. It only covered half of the entryway area so it was time for another Home Depot run! This second trip cost about $60 (9 more bags of gravel, another bag of potting soil, and 4 more plant containers). So in total, we spent just a little over $200 and 3 hours.

ACS_0175-1.jpg

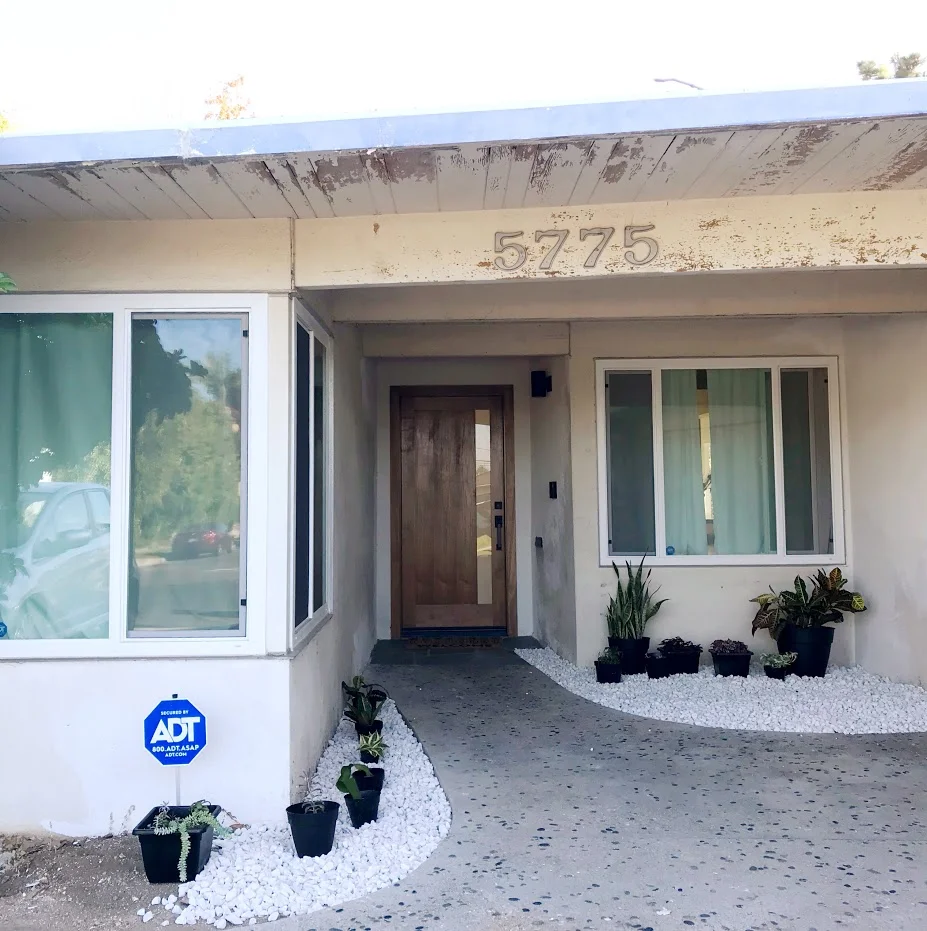
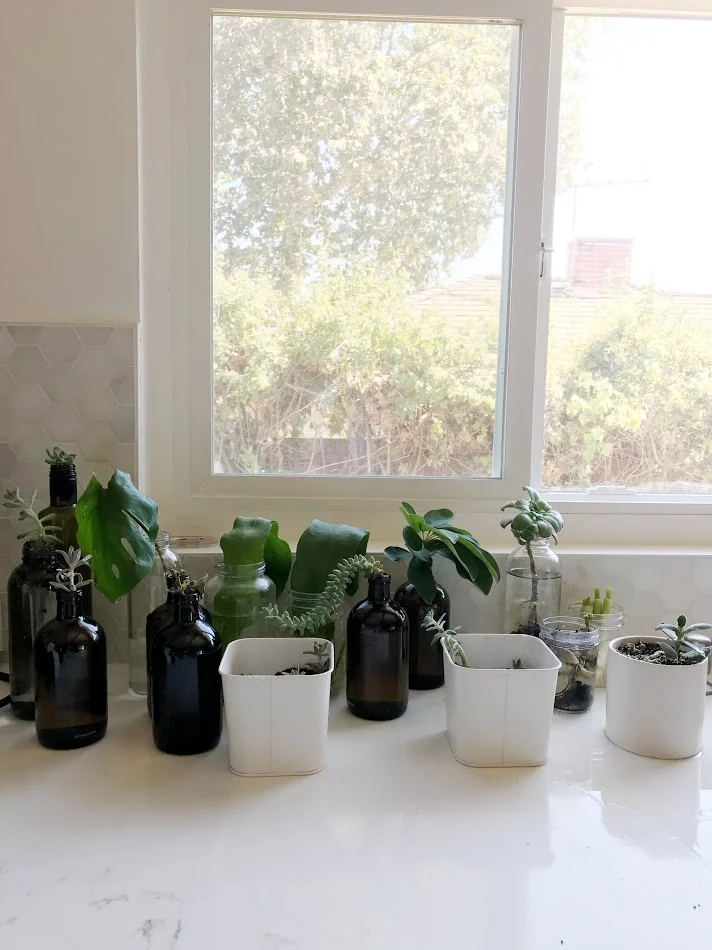
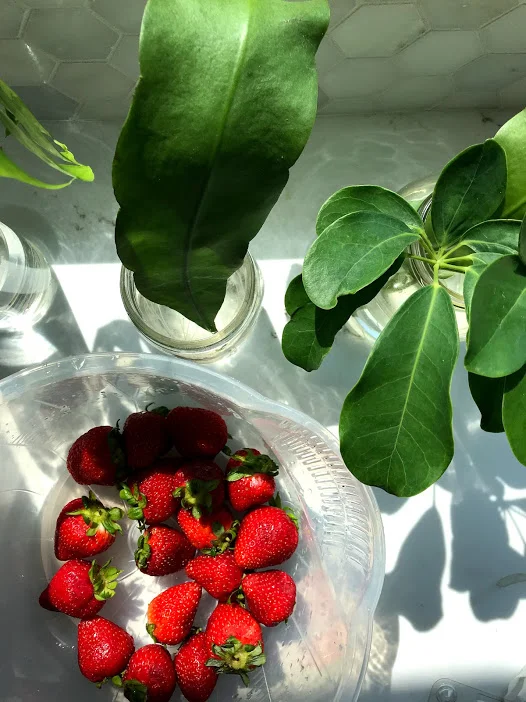
About a third of the plants were ones we already owned and propagated, like the succulents and Queen of the Night leaves that my dad gave me in July. We still need more gravel for a tiny bit of the walkway and the curb area, but we’re so happy with the improvement!

HomeDaphne ChanDIYComment
Post-DestinationWedding Advice

We’re still glowing from our wedding and honeymoon in Bali! Everything went mostly according to plan, we received several cuts from our videographer, and we’re still waiting for the professional photos. We couldn’t be happier! Since my last post, we also learned a few things about the destination wedding planning process.

IMG_7196.JPG

#1. Expect to Play Host

Of course, the amount of your involvement is completely up to you. But since our guests had traveled so far and so long to be with us, we felt that it was the least we could do. The night before our wedding, I even sent out a spreadsheet to help arrange and coordinate shuttle rides home for our guests —a small extra gesture to show our appreciation. We also arranged massages by the beach for our family members who stayed with us at Villa Taman Ahimsa.

#2. The Unexpected is Inevitable

If you’re the type of person who dreams of their wedding going a certain way, I’m sorry to say that a destination wedding is not for you. We put in a ton of time and research to find an amazing coordinator to help minimize any surprises (big hugs to Adria Chew from Avavi Weddings!). But even then, there are some things that are just out of everyone’s control. Like waking up to a mosquito bite on my left eyelid just three days before the wedding (luckily, the swelling went down after I placed a cold water bottle on it for a couple hours). Or vomiting and having a fever just two days before the wedding (likely from a bit of food poisoning). And to top it all off, getting a little sunburnt on my face and sleeping with an ill-fitting eye mask that put a little too much pressure on my eyes the day before the wedding. There’s an expectation that everything needs to be perfect, but if you go into it with the right mindset, everything will be awesome no matter what happens.

#3. Pack Light

I stuffed my wedding dress, reception skirt, tea ceremony dress, and wedding shoes into my carry on. We checked in two bags: one which had Alex’s suit and miscellaneous wedding things (signs, welcome bags, hand fans) and another with our clothes and toiletries. The less you have to bring, the more you can focus on enjoying your big day instead of trying to manage a million little things and inevitably forgetting to repack something.

4. Make Time to Hang Out with Everyone after the Wedding

We made sure to grab our guests’ itineraries so we could be aware of everyone’s travel plans. We were able to squeeze in one more meal with some of our friends after the wedding, and they were some of the highlights of our trip!

5. Hire a Videographer

This was actually a point of debate between Alex and me. However, we were able to meet in the middle and create a custom package with our videographer for 5 hours (plus add-on hours if needed) instead of the usual 8 hours minimum. This allowed us to capture the parts that really mattered to us: moments before the first look, the vows, speeches, and dances. Our videographer Adi from Filomena/Aki Photograph was phenomenal, and we’re so happy with the results. The day flew by so fast! Within two weeks, Adi sent us a 5-minute wedding highlights reel and a one-hour wedding documentation video. We’re so happy that we can also share the video with friends and family who could not attend, and we’ll treasure the captured memories forever.

HomeDaphne ChantravelComment
Glimpses of Married Life

Our first week back home after our destination wedding in Bali involved grocery shopping at Costco, purchasing a Roomba, baking snickerdoodles, reading new books, making arepas with Venezuelan friends, and celebrating Kristy’s birthday.

We’re also decluttering our closets, tending to neglected plants, starting to plant new seedlings after I accidentally over-fertilized our first batch from the summer, and preparing to experiment with pasta making!

New tabs on the blog for recipes, travel, and landscaping to come!

The Easiest Crepe Recipe Ever

Saturday was spent with girlfriends over mimosas, bacon, and strawberry Nutella crepes. This is the second time I've hosted with crepes, and it's now my go-to recipe for entertaining. They require minimal ingredients, minimal effort, cook quickly, and result in a huge crowd-pleaser.

The Easiest Crepe Recipe Ever

Time needed: 10 mins. for prep, 20 mins to cook. Yields 8 crepes.

Ingredients

  • 1 cup all purpose flour

  • 1 tablespoon sugar

  • 1/4 teaspoon salt

  • 1 1/2 cups whole milk

  • 4 eggs (do not separate yolks and whites)

  • 3 tablespoons unsalted butter, melted

  • Optional toppings: Nutella, strawberries, syrup, and powdered sugar OR spinach, mushrooms, and cheese

Instructions

  1. In a blender, combine flour, sugar, salt, milk, eggs, and butter.

  2. Puree until smooth and bubbles form on top, about 30 seconds. Let batter sit at least 15 minutes at room temperature.

  3. Heat a 12-inch nonstick skillet over medium. Give it a spritz of cooking spray. Add 1/3 cup batter and swirl the pan to completely cover it in a thin layer. Cook until the crepe sets slightly (like a pancake), then plop some filling inside. It doesn't have to be pretty because you'll fold the crepe over when it's done.

  4. Cook until the underside of the crepe is golden brown, 2 to 3 minutes.

  5. Loosen edge of crepe with a spatula, then fold into quarters and slide out of skillet.

  6. Repeat with remaining batter (or refrigerate in an airtight container up to one week; stir before using).

Minimalist Favorites

One of my guilty pleasures is watching YouTube videos and reading blogs about minimalism. I'm especially hooked on Rachel AustPick Up Limes, and Hello Hoku.

Becoming a homeowner helped open my eyes to my personal style, especially as we were renovating our kitchen and bathrooms and making such permanent decisions. Will we still like the tile in five years? Will this faucet match the toilet? Will potential buyers feel the same about our ultra pure white cabinetry? 

Renovating and paying a mortgage AND wedding planning also made us hyper-aware of our spendings. We're passionate meal planners, and we try our best to resist making purchases unless we absolutely need it. No splurges on bad days. No snacks. No cheap junk. It's all about functionality.

Today, I started watching Minimalism: A Documentary about the Important Things on Netflix, and it speaks to me on so many levels. Our lives practically revolve around cleaning and caring for our home, and our mood instantly changes as soon as we wipe down the floors or stove. And it's all the little moments in between — making the bed, putting the remote control back into the TV console, putting our shoes in a rack — that help us clear our minds and love our space even more.

Like a lot of our friends in their late 20s, we're also trying to get rid of our old, cheap furniture from college and upgrade to more intentional pieces. Here are a few that we've added to our collection, and others that are on my shopping list.

HomeDaphne Chanlifestyle
Current Mood: Favorite Kitchen Gadgets

Alex & I are dedicated meal planners and spend the majority of our time in the kitchen. We feel naked if we don't grocery shop over the weekend. We pack our lunches nearly every day, make breakfast together, and take pride in winging our cooking instead of following a recipe. So we've grown pretty attached to some of the items in our kitchen. Here are some of our not-so-secret favorites!

#1. Lodge Cast-Iron Skillet

My cast-iron skillet is my pride and joy. When I first started using it, it took forever to wash off scrambled eggs and cheese. But after a lot of TLC and many seared salmon filets later, the seasoning on my skillet is impeccable. Cleaning it is also super easy. I use sea salt to scrape off stubborn bits of food, rinse it, then place it back on the stove to evaporate the water.

#2. Ovalware Cold Brew Maker

We just bought this aesthetically pleasing cold brew maker for coffee and tea, and we use it each day. I'm terrible at making French press coffee, so this cold brew maker is a foolproof way to have strong, fresh coffee every morning with minimal effort.

IMG_6440.jpg

#3. Instant Pot

We got our Instant Pot just as the craze was beginning, and it's never let us down since. We use it to make rice, soup, porridge, hard-boiled eggs, stews... I've even made a cheesecake with it.

#4. Breville Juicer

In preparation for our wedding and getting our #BaliBod into shape, Alex has been juicing and I've been dumping the pulp in my compost bin. I bought this juicer after watching Fat, Sick, and Nearly Dead and it's great at handling tough veggies like carrots and beets.

IMG_5047.jpg

#5. Microplane

It's one of those little things you never knew you needed. I love making Chinese sauces with garlic, ginger, and green onion, and the microplane is perfect for shaving up the ginger. I'm also a big fan of lemons, and it adds the perfect amount of zest to dressings and dishes.

DIY Stamped Canvas Bags

We’ve started packing a suitcase for all the wedding items we need to bring over to Bali: placecards, favors, accessories, etc. We’re also making welcome bags for our guests to fill with small personal items like individually packaged Tylonel, Pepto-Bismol, and makeup remover wipes.

Some people go crazy elaborate with their welcome bags, but we wanted to keep it simple and affordable. Luckily, we had these small canvas bags from Alibaba stashed away from a previous project. Alex used our stamp kit and ink to customize our names on the welcome bags and voila!

DIY Stamped Canvas Bags

Time needed: 30 mins. for 50 bags

Supplies

Instructions

  1. Choose your letters and tape them together in a row. You might need to get creative here for words or phrases that have repeating letters. For example, we stamped “ALEX & D” first, then went back and taped together “APHNE.”
  2. Practice on a piece of paper to make sure they’re aligned properly (some letters may not hit the ink even if you’re think they’re straight).
  3. Once you’re happy, stamp away on the canvas bags!
  4. Let dry and feel proud.
How to Plan a Destination Wedding — in Bali!

Growing up, I was never the type of person who fantasized about my perfect wedding day. I knew I would have a pretty dress that would make me feel like a princess. I knew the photos and decor would be beautiful. And I always knew I would plan it with my future husband so that it would be special to us.

We got engaged in Paris almost immediately after our friend's wedding in Italy. Paul and Marisa booked an 8-bedroom villa in Florence for their family to stay with them, and we loved the idea of having a central location for both relaxation and the ceremony/reception.

We tossed around the idea of having it somewhere near the ocean like the Maldives or Santorini. But we decided on Bali for a few important reasons. We've heard great things from friends who've traveled there multiple times. The cost of having our wedding there is also significantly more affordable than if we were to have it in Los Angeles. And it's a 4-hour flight from Bangkok so Alex's grandma can comfortably attend. Of course that means for the rest of us, it's a minimum 19-hour trip. But it's a small price to pay for paradise. :)

If you're planning a destination wedding or are curious how we're planning ours, here are my biggest tips.

#1. Hire a Coordinator

You're going to want someone who knows the language and the lay of the land by your side. After we picked the location and venue, I spent a few weeks scouring the internet for wedding planners in Bali (who also had to meet the villa's certification requirements). I made a huge spreadsheet to track who I emailed, who responded, who I liked, and who I scheduled Skype interviews with. Ultimately, we chose Adria from Avavi Weddings and the By Your Side package. This meant that Adria would help refer vendors, but it was up to us to interview them, choose one, schedule everything, and keep track of when to pay them. 

#2. Get Used to Foreign Money and Time Zones

For me, this was the hardest part. There was always a bit of extra coordination needed to communicate, and we mentally prepared ourselves for sticker shock (keep in mind that 14,250 Indonesian rupees equals about $1 USD). So we got used to seeing lots of zeros and holding our breaths before realizing that things weren't as expensive as we initially thought. We also got used to wiring money from our bank and erred on the side of overpaying to account for bank transfer fees. 

#3. Send E-Mails to Your Guests

They'll appreciate it! Since many of our guests have never been to Bali, Alex and I took a short trip at the end of May to meet with our coordinator and get a feel for the culture. Afterwards, we sent an email out to share our experience with our guests and set expectations. We also sent a reminder RSVP email and plan to send one more final email with a packing checklist, important addresses, and phone numbers.

#4. Account for Worst Case Scenario

We're going to pack our suit and dress in our carry-on in the event that our luggage gets lost. We also recommend asking your coordinator to locate the nearest doctor and hospital, just in case.

#5. Make Pinterest Boards

Live your best Pinterest life and make a board (or five) to send to florists, decorators, cake designers, etc. It's tricky to plan a wedding that's far away especially with language barriers, so try to communicate with visuals as much as possible. Here is one of mine

#6. Get There Early

We're leaving on Aug. 29 to prepare for the wedding on Sept. 4. That gives us enough time to adjust to the jetlag, greet our guests at our Welcome Lunch on Sept. 3, and settle in with our friends and family.

#7. Keep It Simple

You're already in a beautiful location so not much else is needed. We also decided to not have bridesmaids or groomsmen and omit DIY projects. The simpler, the better.


Now go enjoy your wedding!

Weekend Hosting

With just a little over a month before our wedding, we had a rare free weekend to stay at home and chill. So in addition to cleaning and errands, it was the perfect time to catch up with friends!

First, Friday night was spent at the movies to watch Jurassic World. We're trying to get our money's worth with our Moviepass before it inevitably tanks. Plus, we were hardcore craving movie popcorn after I gifted this popcorn maker and flavor set to Jordan for his birthday. Nom nom nom.

Kat and Jeff came over for Saturday morning brunch, spoiling us with acai bowls and brie toast as we worked up an appetite for homemade Nutella crepes. We even got to meet their new doggy, Pepper!

We decided to start playing Pokemon Go again so we took an afternoon stroll catching Pokemon and stalking the property value of houses in the neighborhood. Then at night, Steph and Dennis joined us for homemade carbonara, drinks, and Porto's.

Sunday morning was spent at Costco, as usual, followed by a stroll around Sawtelle for more Pokemon and a stop by Daiso for wedding supplies. We cleaned, cooked, balanced wedding deposits, and checked off a ton of things on our to-do lists. Things are starting to ramp up so we're trying to get everything in order before my bachelorette weekend (thank you, Rachel and Léna!), Mike and Melanie's wedding in mid-August, and our Bali trip in exactly one month!

July Recap

We're 2/3 done with our busy summer! 

To rewind a bit, we spent our first 4th of July by getting a ton of errands done. Cleaning, Costco, lunch at Chipotle, planning seating arrangements for the wedding using post-its on the ground, sewing flowers onto my party dress, dinner with Alex’s mom at the Westfield Century City, and fireworks in Culver City… followed by glimpses of a few fireworks in the distance from our living room windows.

We've been experiencing some LA heat waves which Chef is loving. But our house doesn't have air conditioning, so we've been cranking the bedroom fans and opening the windows for a nice cross-breeze. Ryan and Shelley also gave us an extra air conditioning unit which we've been using in the living room and bedroom. It reminds me of Eve from Wall-e, and of course it freaks Shabu out. 

I got promoted to Senior Copywriter, and to celebrate, and I another set of lobe piercings! We also purchased our wedding bands. One more thing off the wedding checklist!

Alex's mom took us out to celebrate with an omakase (my first one!) at Okumura and gifted us our first set of Calphalon pots and pans. We finally threw away all our old pans from IKEA!

Amara also gifted us this beautiful Crate & Barrel wok, and we've been using it to cook up all kinds of yummy things.

Then the big highlight of July was our Bali in Cali party on the 14th. Since we never had an engagement party, we wanted to have a celebration here in LA to spend time with those who won't be able to make it to Bali. We ordered catering from King's Hawaiian, decorations from Amazon, Ryan and Shelley set up their photobooth, and Alex and I wrote a very ridiculous speech/performance.

My dad flew back the day after, but my mom stayed for the week to enjoy time with us and the dogs, home-cooked meals, Disneyland with Leslie, and the Getty. With the convenience of the guest room in our house, it was one of the more comfortable trips my parents have enjoyed (still feels weird to say it though).

Next on the agenda, we're finalizing our honeymoon plans and paying off our vendors. We have about one month to go before we're on a plane halfway across the world!

Pinterest Sucks but is Also Great

Searching Pinterest for beautiful home remodel inspiration is so much fun!... and a huge pain.

On one hand, there are so many possibilities! Everything looks amazing! It matches my style perfectly!

But then you realize it’s super expensive. Or that a lot of the fixtures don’t meet certain requirements (i.e. California’s WaterSense specifications that only allow 2.0 gallons per minute). Or your pipes just aren’t arranged the right way to handle certain configurations. It’s beyond discouraging and frustrating to see something that’s so close in a photograph, yet so far away in reality.

IMG_5602.jpg

My biggest piece of advice is to use Pinterest in the beginning of your remodel, but wean off of it as you start to work more closely with your contractor, especially towards the end. Your contractor will be able to tell you what’s actually feasible so you can stay within budget and have a result that works for your space.

Here’s a look at my Pinterest board. As you can tell, we were actually able to pull some of it off in our house. Other photos were purely inspirational… or we’ll save it for the next house. ;)

Buying a Dining Table

I’ve been keeping my eye on dining tables since the beginning of the year, trying to figure out the best style to suit our needs and hopefully land a sale. With five of Alex’s family members and his grandmother in town from Bangkok, we felt it was necessary to finally buy one instead of gathering around the kitchen island.

I always loved the idea of a round, white table. It fits perfectly in our dining area, and I like having a round, inclusive table instead of something rectangular because no one ever wants to sit at the head of the table. A few that stood out:

But then I started to like the rectangular ones. We could pair it with a dining bench or easily extend it to seat more guests.

Luckily, I was able to find a hybrid of the two. This beautiful, round West Elm table can seat four people but comes with an leaflet so the table can extend into an oval and seat up to six people. It’s mid-century modern, easy to clean, and was delivered fully assembled.

IMG_5855-2.JPG